Showing posts with label jar love. Show all posts

9.29.2014

Jar Love: Can-apalooza 2014

Last week, while I was standing at the sink peeling, pitting, and slicing peaches for the umpteenth hour of canning my son asked me, "Mom? Is it fun to can?"

Uhhhh....

Is it fun? To stand on your feet for hours on end. To have your fingers split from being constantly wet and gooey. To keep your stomach steady while carving out bugs, bruises, and bad spots from produce. To accidentally singe or slice your fingertips. To tremble with fear every single time you have to light the propane-run camp stove. To wash dozens and dozens of canning jars. To have to clean the sticky, wet kitchen afterwards. Fun???

Well...not exactly. But oh the sense of pride. My inner Little Red Hen is practically crowing at the sight of all those freshly sealed canning jars that will feed my family for the coming year. I know exactly what went into my food. No gluten, no dairy, no preservatives, no chemicals, no mystery ingredients. Feeling secure in these ways gives me such complete satisfaction that can be achieved in very few other activities.

This year, my sister Erin and I took on the mother load of canning. Everything kind of lined up two weekends ago. My husband was out of town. I had the truck. I had the time. I drove my truck down to my sister's place stopping at a local farm to purchase apples and peaches. The ladies that helped me load box after box just kept saying, "Are you sure you can do this? This is a project! Are you sure?"


Ye of little faith...

It took us all weekend working together and then a few days beyond that working on our own but we did it! Over 300 jars of peaches, pears, applesauce, apple pie filling and raspberry jam between us. Whew! (I only took home peaches and jam this year. Everything else was for Erin.)


Behold, the Riley Women at work!

Much thanks to my brother-in-law Kip for keeping eight kids fed and entertained all weekend. We couldn't have accomplished it without him.

Kip showing Dee and Cee his bees.


Some notes to self for next year. (Don't mind me; I just need a safe spot to put this stuff so I can find it next year):

*While the 2nd pick peaches ($10/half bushel box) may be the better financial deal, they aren't always the easiest to can. Lots of gross spots to cut out, lots of green produce. If you can afford it, go with the first pick ($20/half bushel box).

*I purchased 10 boxes of peaches but only canned about 8.5 of them for a little over 80 sealed jars. Several of the boxes were too green to can all at once. I did a few batches after Can-apalooza and then just left the rest for fresh eating.

*2014 was O'Henrys peaches. Not my favorite. Hope to get Angelos again next year.

*Each half bushel box makes about 9-12 jars of peaches.

*Wide mouth jars are best for peaches, but not necessary. Just cut up the peaches in smaller pieces for a regular mouth jar.

*You need more rings. Oh and get sealing lids (especially regular mouth) earlier in the year. Everywhere was sold out by mid September.

*Free raspberries are awesome, but don't load up the boxes too full because they turn into a juicy mushy mess. I tried low-sugar raspberry jam this year. We'll see how it compares to regular jam (which is definitely awesome but so full of sugar). Buy more Pectin.

*Maybe do peaches in a few smaller batches, especially if you have to do it by yourself.

*Try applesauce again next year, but use at least 3 kinds of apples if not more like 6. Honey Crisp, Gala, Wine Sap are some good choices. (Half-bushel boxes cost $20-$22 at Mitchell's Farm this year. How does this compare to lady in ward?)

*Buy a Victorio Strainer for applesauce.

*Purchase a bigger strainer spoon like Erin has. Also a bigger pot for cooking apples.

*Try spaghetti sauce like my cousin Elayne did. This looks amazing!

Oven Roasted Marinara! More than once I have tried to boil down juicy tomatoes to make sauce. After hours of boiling, the overcooked tomatoes just don't taste that great anymore. 
Today I discovered oven roasted marinara sauce and it's just too good not to share.

I filled as many pans as I could fit in the oven at once. A few red peppers and onions on top. (I think I would skip the red peppers and do garlic and fresh basil instead.)

Roasted @350 until soft and slightly caramelized. I think mine went about 1 1/2 hours.

Drain them before you process them into sauce. I put mine through a food mill so I didn't have to core the tomatoes or peel the onions before hand.

The end result was nice and thick, I just seasoned it and let it simmer a few minutes before I canned it. Best sauce so far.

9.18.2014

Jar Love: Gluten Free Cupcakes in a Pinch

I'm starting yet another weight loss challenge on Saturday in hopes of recapturing that fat-burnin' fire I once had. (Fingers crossed it works this time.) So obviously I'm looking to bulk up over the next couple of days cramming whatever I can down my face while I still can.  Makes perfect sense.

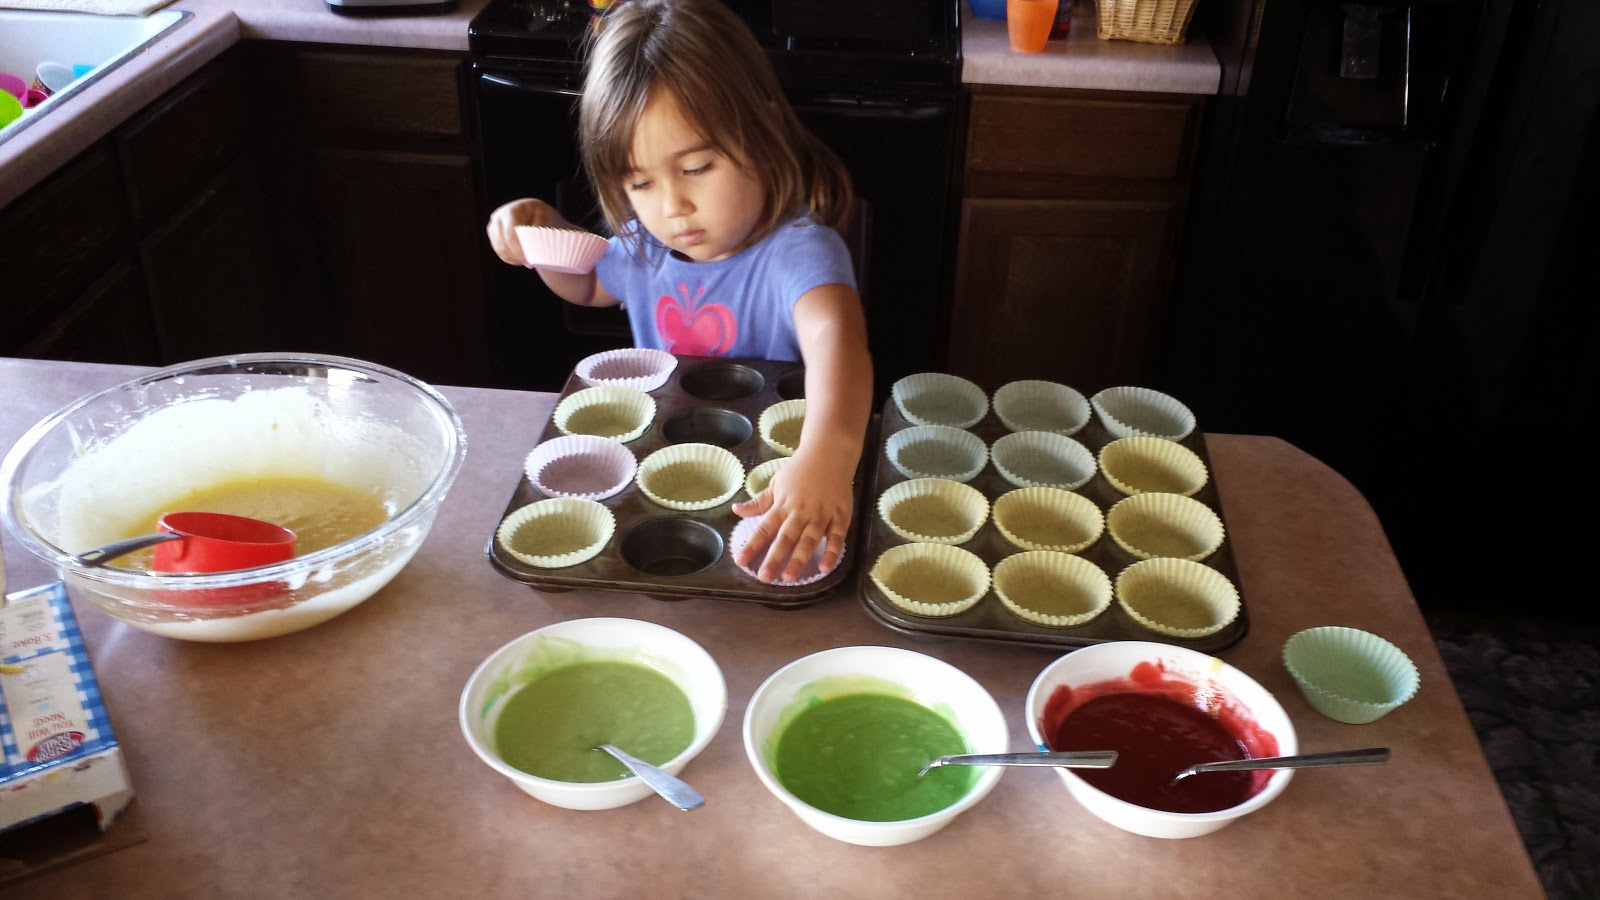
Time for preschool? No problem! Let's make cupcakes for preschool! We can cover Chemistry, counting, colors, hygiene, practical life skills, and fun all while Mommy gets her sugar fix. I call that a win-win.


After a fun preschool session a counter top full of cupcakes greeted the oldest three children as they returned home from school. Dee and Jeigh were thrilled, but poor Elle who has Celiac disease... "But what can I eat?" A question this sweet kid has to ask way too often. "Uhhh...What can you eat?" I was all out of gluten free cake mix and time. Time to improvise!

As they say, Necessity is the mother of invention and so I present today's edition of "Jar Love": Gluten Free Cupcakes in a Pinch!


While this isn't the most ideal "cake" recipe it definitely got us by on this day. And in record time. Less than 2 minutes from start to finish! And finding yet another use for my beautiful jars?? I'm a happy girl!

I found a recipe for "gluten free bread in a cup in seconds" a while ago on Pinterest originally from a blog called One Good Thing by Jillee. I have used this recipe several times when I needed some gluten free bread in a hurry for Elle though I usually leave out the sugar since it tastes a little too sweet to me. I've used a bigger flat bowl to make a pizza crust too. Again, not ideal, but when it comes to gluten free sometimes you just gotta do what you gotta do.

For cupcakes I doubled the sugar in the original recipe where I didn't feel it would be sweet enough for a cake. Make sure to check out her post and the other variations (sugar and spice, Italian, chocolate, cornbread!) she has there.


Gluten Free Cupcakes in a Jar
(adapted from One Good Thing by Jillee)
Time: SERIOUSLY 2 MINUTES!!

1 large egg
1 tsp water
3 TBSP buttermilk (or 3 TBSP milk plus 3/4 tsp vinegar, stir and let sit for a few minutes. You could also use a milk substitute such as almond, rice, or soy milk.)
1/3 cup Bisquick All-Purpose Gluten-Free Baking Mix
2 tsp sugar 


Grease a wide mouth pint jar. Mix wet ingredients together in jar. Add Bisquick and sugar and mix until moist. Clean off edges of jar and smooth the top of the batter. Microwave for 85 seconds. Lightly touch top to make sure cake is cooked. Microwave for a few seconds longer if still uncooked on top. 


Allow the cake to cool a little in the jar then run a knife between the cake and the jar and carefully slide out. Allow cake to cool completely on a rack or plate and then cut into 2 or 3 cupcakes. Frost and enjoy!


We struggle with gluten free baked goods in our house. Elle doesn't seem to like many of the mixes and recipes I've tried so far. Gluten free ingredients and mixes are atrociously expensive so I get really frustrated with spending so much money on something that my girl only takes a bite of and pushes away refusing to eat anymore.

I can hardly blame her; a lot of gluten free breads, cakes, cookies, etc range from tolerable to repulsive. I was pleased she found this quick and easy substitute acceptable. She actually ate the entire cupcake!  Add that to all the win we are made of today and I think this calls for another cupcake! Gotta get them all out of the house before Saturday, right?

4.03.2013

Vlog Vednesday: How to Dry Pack Easter Candy

Last year I wrote a blog post on what to do to preserve all that naughty leftover Easter candy. This year, I thought I would make a video about it for Vlog Vednesday.

Same information as the blog post. This one goes out to all those "visual learners".


2.19.2013

Jar Love #7: Cream of Something (Gluten-Free!)


When it comes to good, old-fashioned home cooking, there is a standby ingredient that millions of home have sitting in their pantry or cupboards. Millions of homes including my own.

Campbell's Cream of Mushroom/Chicken/Celery/Potato/Broccoli Soup

Only in my home, those cans are collecting dust and have been since Fall of 2011. Well, more like Summer 2005.

Campbell's soup may be convenient and tasty and a key part of great recipes, but they're also full of dairy and gluten; two things two of my little ones can't eat with a dairy allergy and celiac disease. I really try to avoid the chaos of preparing three different meals for my family--life is crazy enough as it is--so Campbell's Cream of Whatever hasn't been on my shopping list for awhile. And the recipes that call for it have been off the table too.

No Cheesy Potatoes.
No Chicken and Rice.
No...Uhhh...It really has been so long since I've cooked any of those recipes that I can't even remember what they are.

Forget about the gluten and dairy! Those classic red and white cans are full of sodium, fat, and a bunch of other unhealthy junk. AND they're just so darn expensive. Was it really so bad that my children's food issues prevented me from using any Campbell's Cream Soups? Probably not.

But come on. What really goes better with ham than Cheesy Potatoes?

Well, thanks to Pinterest and this "Cream of Something" recipe we can have Cheesy Potatoes again! AND I have a way to use some of the non-fat dry milk that's been sitting in my food storage for who knows how long! AND I get to use my jars for easy mixing and storing! *happy tears flood eyes*


Cream of Something Recipe (slightly adapted from THIS recipe):

1 cup non-fat dried milk
3/4 cup cornstarch
1/4 cup beef/chicken/veggie bouillon (granules or powder, NOT cubes)
4 TBSP dried minced onions
1 tsp dried basil
1 tsp dried thyme
1 tsp pepper
1 tsp salt

Pour all ingredients into jar. Screw on lid and shake jar to mix thoroughly. Label lid with preparation instructions (For the equivalent of one can of condensed cream soup: mix 1/3 cup dry mix with 1 1/4 cup water. Heat in sauce pan on medium until thick.) Store in pantry.


I was rather skeptical the first time I tried this recipe. Could this really taste that good? Will this mix actually thicken? It worked perfectly! It does NOT taste exactly like Campbell's soup, but it is delicious nonetheless in it's own way. And it has to be healthier than the canned stuff. Less preservatives, salt, and fat. And most importantly for us, it's GLUTEN FREE!

So what did I use it for? Well, Cheesy Potatoes of course! Even though it's gluten-free, it's not dairy-free, so Dee had to eat the shredded potatoes minus the delicious, creamy sauce, but he's used to it. He was pretty pleased with his plain potatoes. (Say that three times fast!)


So, just to reiterate why this Cream of Something mix is so fantastic...
...gluten free!
...no mystery ingredients!
...lower in sodium and fat!
...uses up some of that Non-Fat Dried Milk you have sitting in your food storage!
...less expensive!
...can be stored in a jar! Feelin' the Jar Love on this one for sure!

2.07.2013

Jar Love #6: Fruit Fly Pest Control

Jars are pretty. They hold pretty, pretty things. And pretty nutritious things. And then sometimes, they hold not so pretty things, yet they prove for the millionth time to be pretty darn useful.

Check this out.

For the past several months we've had a problem with flies. Tiny, red, pesky flies. Just buzzing around our house, particularly the kitchen and the bathroom. They were irritating to say the least, but they made me paranoid too. Is my house dirty? Are my cleaning skills not up to par? Do I have a problem?

Finally one day I got so fed up I went online and researched the little buggers. Turns out I did have a problem and that problem was called "fruit flies". Fruit flies are attracted to produce that is sitting on your counter. So I put the produce away.

But the flies didn't go away. So I did some more research. Fruit flies can be attracted to food remaining in your garbage disposal. So I was extra diligent in making sure the disposal was clean. And the counter was clean. And the kitchen in it's entirety was clean.

But the fruit flies remained. In my bathroom too. Which was void of produce and garbage disposals anyway.

Grr.

Finally I read that cider vinegar in jars placed in areas that are fruit-fly-infested will do the trick.

Jars, you say?

I prepared my jars, placed one in the bathroom and one in the kitchen, and in one week's time my home was fruit-fly-less! And still is!

In case you have the same problem, you will need:

jar
cider vinegar
aluminum foil

Pour cider vinegar (and it must be cider vinegar! Apparently the smell resembles rotting fruit, aka fruit fly crack) into jar. You don't need much. Just enough to drown the little buggers.

Place aluminum foil over jar opening. 

Poke ONE hole into foil. (When I first did this I poked several holes and soon realized the flies were just coming and going as they pleased. My husband had the insight to change the foil and poke ONE hole. This way the flies go in, but can't quite figure how to get back out.  Not the smartest link on the food chain.)

Place jars in kitchen and bathroom.

Change out cider vinegar every couple of days.

After a week you ought to be free of your fruit-loving pests! 

Jars save the day again!

2.06.2013

Jar Love #5: Brown Rice

Just a little more jar love...

I've been dry packing again, using THIS method.

This time it's not leftover Easter candy. (Rats!) Nutritious, gluten-free brown rice that I purchased in bulk from my local Costco will be saved nicely in smaller portions for my food storage.


Candy or rice, it all looks so pretty to me sitting in clean canning jars. My inner Little Red Hen is preening.


Helpful hint: I cut out the nutrition and preparation information from the bag and stuck it in my recipe book for future reference.

2.05.2013

Jar Love #4: Money, Money, Money!

Later on this week, I'm going to work up the guts to share a post about money...or more specifically, debt. Until then I wanted to share this very cool idea that was floating around on Facebook at the beginning of the new year.

Undoubtedly we all have similar resolutions on New Years Day. "Save money" is always on my list, whether I'm willing to write it down or not; whether I'm willing to stick to it or not. When I saw this clever little method for saving money, I was convinced that "save money" was one resolution I could keep this year.

And it didn't hurt that a jar was involved. We all know how much I love my jars.

Here's the idea...

Print off a copy of this 52 Week Money Challenge page...

And glue or tape it to a jar.
Now, add money.


Make sure to put your jar in a highly visible place so you remember to add to it weekly. If you follow the paper exactly, you will add $1 on Week 1, $2 on Week 2, etc, etc, etc.

Or you could do the opposite. Work backwards. Add $52 on Week 1, $51 on Week 2, etc, etc, etc.

OR you could even add as you are able. Week 1, I can spare $1 for my jar, but Week 2, I can afford more and add $30 to my jar. Brilliant, no?

By Christmas time you should have a spare $1,378.00 sitting in a jar! What would you do with $1,378.00???

5.22.2012

Jar Love #47: Homemade Sugar Scrub for Mothers' Day Gifts


When I was looking for Mothers' Day gift ideas a couple of weeks ago, my love of jars may or may not have influenced my search results.

Homemade sugar scrub...? In canning jars...??

Yes. Please. And thank you!

The truth: I know knew very little about what exactly one does with sugar scrub. (Do you eat it or wash walls with it?) But after a bit of research I discovered sugar scrub (and even more so HOMEMADE sugar scrub) is all the rage for those poor, cracked, scaly, summer-ravaged feet and hands out there. It claims to exfoliate and rejuvinate even the most abused skin. Ahhh! And I've been suffering in silence all this time.

So I figured I would give it a go. I found a recipe for homemade lemon sugar scrub. Now to find all the "gourmet" ingredients...

Sugar. As in regular, plain, old, ordinary, baking, table, cereal sugar. Check.
EVOO. Extra virgin olive oil. Check.
Lemon juice. Bottled. Check.
Essential oils. Screeeech!

After a tad more research I discovered essential oils can be obtained at your local natural/health food store. One quick "Kids! To the van!" later...I had some essential oils in my hot little hand. Lavender. Mmmm.

Back home and about 2.41 minutes later I had my own resealable jar full of homemade lemon sugar scrub. Fresh, fragrant, and fully capable of exfoliating all that yucky skin off my hands and feet. I tried it out on my scaly legs too and it worked beautifully! Smooth, satiny, and rejuvinated with lemon and lavender!

Side note: Someone mentioned that sugar scrub was good to shave with. I don't know if I was doing something wrong or if I'm just a wimp, but after one swipe with the razor...I have come to the conclusion that you should indeed NOT shave with sugar scrub. OUCH!

Armpit note: Scrub is not to be used on your face either. Facial skin is much too delicate.

After making my own jar of scrub I was hooked. The world must know of the goodness of homemade sugar scrub! I went on to make a couple of quadrupled batches in my big popcorn bowl. My childen kept begging for a taste as I giddily stirred my sugar, EVOO, lemon juice, and essential oils concoctions.

25 eight ounce canning jars later...


...I had Mothers' Day gifts for the moms of the primary children of our ward, thank yous for Teacher Appreciation Week, and more Mothers' Day gifts for our own moms, grandmas, and friends.

The beauty of homemade sugar scrub (besides the obvious eye appeal of it sitting on the counter in a clear canning jar) is how easy it is to make, adjust, and personalize. Don't like lemon or lavender? No problem! Try peppermint instead. Or vanilla. Or use brown sugar instead of white. Or switch out the EVOO for grapeseed oil. You really can't go wrong with this. There are tons of free recipes online for homemade sugar scrubs.

Once you have your jars filled, decorate and personalize your containers to your heart's desire. Again, if you're feeling creatively flat, go online for lots of decorating ideas. For my jars, I used a big circle paper punch to cut out circles of lemony yellow scrapbook paper. I applied it to the jar front and lid top with Modge Podge.


I figured there might be other people out there who are as clueless as I was about sugar scrubs so I added a label as well as a tag with the scrub ingredients, an explanation of what it was, how much to use, and to make sure to stir it up before each use.


I also wrote and attached a little poem to the Mothers' Day jars. I just couldn't let a good pun opportunity pass me by.


Recipe for Homemade Lemon Sugar Scrub (makes 12 oz with a bit to spare):
2.5 cups sugar
1 cup EVOO
4 TBSP lemon juice
several drops of essential oil

Combine ingredients in bowl. Mix thoroughly into a gritty paste. Pour into desired container. Seal tightly. Oil will separate as it sits; make sure to stir again before each use.

I know I'm a little late for Mothers' Day now, but this would make a great baby shower favor, an addition to a new mother basket, a thank you for the church ladies, or a "just because I was thinking of you" treat. And don't leave yourself out! Whip up a batch and spoil your own hands once in awhile. Especially after you've covered them in gardening grime, pasty paint, or crafting crud.

5.15.2012

Jar Love #76: Homemade Taco Seasoning


Hi. My name is Evelyn. And I am addicted to jars. More specifically canning jars. Even more specifically, canning jars of the Kerr, Mason, and Ball persuasion. And if you want to get very specific, antique jars just about send me over the edge.

It's not a sickness.

They're useful. And pretty. And really useful in so many ways. And really pretty. In so many ways.

(Am I the only weirdo out there who's heart starts racing a bit at the sight of glass jars? Come on, fellow jar addicts. Give a girl a little love.)

Don't get the obsession? Allow me to share one of the uses for those empty jars: homemade taco seasoning!

For years I have purchased ready-made taco seasoning in the little packets as well as in bulk to make tacos, nachos, burritos, taco soup, etc. But it finally dawned on me recently (and more recently than I care to share) that the ready-made taco seasoning often has dairy and wheat ingredients, besides a whole bunch of other unmentionable stuff. Big no-nos for dairy allergies, Celiac Disease, and dieting.

I have to admit (for I am full of confessions today) that I initially assumed we would no longer be able to enjoy Mexican food as a family. Welp. Add one more thing to the "can't" list. *grumble*

Did you know you can make your own taco seasoning???

I didn't.

In hindsight, I feel pretty silly admitting that I didn't know you could make your own taco seasoning. Really, I'm not stupid. Way back when I had a 3.7 GPA and I did get a 28 on my ACTs. Both times I took it. But sheesh, I can be pretty slow about things sometimes.

Enough about me and my molasses brain...(By the way, I blame the kids. They sucked the smarts right out of me with each pregnancy and all the subsequent sleep deprivation. I sure hope they enjoy all those brains I utilized once upon a time.)

Homemade taco seasoning! You can find lots of recipes out there in Google Land. From the gourmet to the budget savvy. Here's the link for the one I am using lately. It's not too spicy for the kids. Plus, this blogger comes from the same mold I do. That being the jar obsessed mold.

Homemade Taco Seasoning Mix:
1/2 cup chili powder
1/4 cup onion powder
1/8 cup ground cumin
1 Tablespoon garlic powder
1 Tablespoon paprika
1 Tablespoon kosher salt

Dump all your taco seasoning mix ingredients in the jar, shake, and store in your cupboard. Use 3 TBSP of mix per pound of ground beef.

No stress! No mess! No waste! And it just looks so cute! At least to this "jar head".

More jar love to come...Mother's Day Sugar Scrub!

LinkWithin

Related Posts with Thumbnails