Showing posts with label recipes. Show all posts

3.22.2013

A Happy to Be Gluten Free Recipe: Chicken Taco Soup

This week we discovered that my four year old niece has Celiac Disease and Type I Diabetes. I really can only half way imagine what her parents are feeling right now. I remember when my little four year old was diagnosed with Celiac. It was devastating.

While not immediately life threatening, Celiac can lead to a plethora of problems in the future, including infertility, cancer, osteoporosis, diabetes, depression, etc. It was terrifying to hear these things could be in my little daughter's future. Plus, it was just so overwhelming to learn I could no longer feed her gluten. Gluten...which is in...everything.

There definitely was a steep learning curve and mountains to climb as we have learned how to live with Celiac. And that was only one major health issue. My poor little niece has diabetes to contend with on top of all that. We really have had her in her hearts and prayers this week.

I have posted a few gluten free recipes on my blog. I want to help however I can, so I plan to post more in the future...starting now...

Here's what we had for dinner tonight...Chicken Taco Soup!


Delicious, healthy, easy to throw together, and gluten- and dairy-free. There are lots of beans in this soup which makes it a great source of non-animal protein. I'm running a half marathon (plus three miles) tomorrow morning so I'm hoping this will power me through. Even if it's "gas-power". ;)

Love my little helper!


Chicken Taco Soup (adapted from a friend's vegetarian taco soup)

Olive oil
1 or 2 cans chopped green chilies
1 medium onion, chopped
3 TBSPs homemade GF taco seasoning (or 1 pkg taco seasoning)
1 can pinto beans, drained and rinsed
1 can Great Northern white beans, drained and rinsed
2 (14 ounce) cans of peeled, cut tomatoes (or 1 qt canned stewed tomatoes)
1 can yellow hominy (or corn)
1 can white hominy (or corn)
1 pound chicken, shredded (My canned chicken breast works perfectly for this!)
2 TBSP salsa (optional)
2 to 3 cups of water
1 to 2 tsps chicken bouillon, to taste
salt and pepper to taste

In a large pot, sauté onion and chilies in oil for about 3 minutes. Add the rest of the ingredients and bring to a boil. Reduce heat and simmer for 30 minutes. Serve with tortilla chips, grated cheddar cheese, and sour cream.

A few notes...This can very easily be a vegetarian meal; just leave out the chicken and bouillon!

If you are using chicken, a rotisserie chicken, such as the ones they sell at Costco, works very well for this recipe. Or you can just prepare some chicken breasts and shred them.

The beans are flexible, in that, you could put in whatever beans you have on hand. Black beans, kidney beans, navy beans, etc.

This recipe was my first encounter with hominy. If you've never had it, you've got to give it a try! Hominy is a form of corn, but it's just not the same. It has a fantastic, almost chewy texture which I love. It can be found near the canned beans in your grocery store or in the ethnic food aisle.

I love this recipe because it is a "dump it all in and simmer for a bit" kind of recipe. Whether you eat gluten free or not...this is a yummy meal. Hope you like it as much as we do.

2.19.2013

Jar Love #7: Cream of Something (Gluten-Free!)


When it comes to good, old-fashioned home cooking, there is a standby ingredient that millions of home have sitting in their pantry or cupboards. Millions of homes including my own.

Campbell's Cream of Mushroom/Chicken/Celery/Potato/Broccoli Soup

Only in my home, those cans are collecting dust and have been since Fall of 2011. Well, more like Summer 2005.

Campbell's soup may be convenient and tasty and a key part of great recipes, but they're also full of dairy and gluten; two things two of my little ones can't eat with a dairy allergy and celiac disease. I really try to avoid the chaos of preparing three different meals for my family--life is crazy enough as it is--so Campbell's Cream of Whatever hasn't been on my shopping list for awhile. And the recipes that call for it have been off the table too.

No Cheesy Potatoes.
No Chicken and Rice.
No...Uhhh...It really has been so long since I've cooked any of those recipes that I can't even remember what they are.

Forget about the gluten and dairy! Those classic red and white cans are full of sodium, fat, and a bunch of other unhealthy junk. AND they're just so darn expensive. Was it really so bad that my children's food issues prevented me from using any Campbell's Cream Soups? Probably not.

But come on. What really goes better with ham than Cheesy Potatoes?

Well, thanks to Pinterest and this "Cream of Something" recipe we can have Cheesy Potatoes again! AND I have a way to use some of the non-fat dry milk that's been sitting in my food storage for who knows how long! AND I get to use my jars for easy mixing and storing! *happy tears flood eyes*


Cream of Something Recipe (slightly adapted from THIS recipe):

1 cup non-fat dried milk
3/4 cup cornstarch
1/4 cup beef/chicken/veggie bouillon (granules or powder, NOT cubes)
4 TBSP dried minced onions
1 tsp dried basil
1 tsp dried thyme
1 tsp pepper
1 tsp salt

Pour all ingredients into jar. Screw on lid and shake jar to mix thoroughly. Label lid with preparation instructions (For the equivalent of one can of condensed cream soup: mix 1/3 cup dry mix with 1 1/4 cup water. Heat in sauce pan on medium until thick.) Store in pantry.


I was rather skeptical the first time I tried this recipe. Could this really taste that good? Will this mix actually thicken? It worked perfectly! It does NOT taste exactly like Campbell's soup, but it is delicious nonetheless in it's own way. And it has to be healthier than the canned stuff. Less preservatives, salt, and fat. And most importantly for us, it's GLUTEN FREE!

So what did I use it for? Well, Cheesy Potatoes of course! Even though it's gluten-free, it's not dairy-free, so Dee had to eat the shredded potatoes minus the delicious, creamy sauce, but he's used to it. He was pretty pleased with his plain potatoes. (Say that three times fast!)


So, just to reiterate why this Cream of Something mix is so fantastic...
...gluten free!
...no mystery ingredients!
...lower in sodium and fat!
...uses up some of that Non-Fat Dried Milk you have sitting in your food storage!
...less expensive!
...can be stored in a jar! Feelin' the Jar Love on this one for sure!

2.15.2013

My Yummy Valentine


I've noticed a developing trend in our home on Valentine's Day. In fact, I might even be bold enough to say we have a true "Day of Love" tradition! Ooo! I'm a sucker for a good tradition. Especially a tradition that involves food.


For the past several years we have skipped the romantic dinner out for two and opted instead for a fun family dinner at home. Sure, this means more work for me as the primary food preparer in our home, but I find I quite enjoy it, especially as I feel this culinary contribution is my own special valentine to the ones I love the most. The way to your family's hearts are through their stomachs, right?


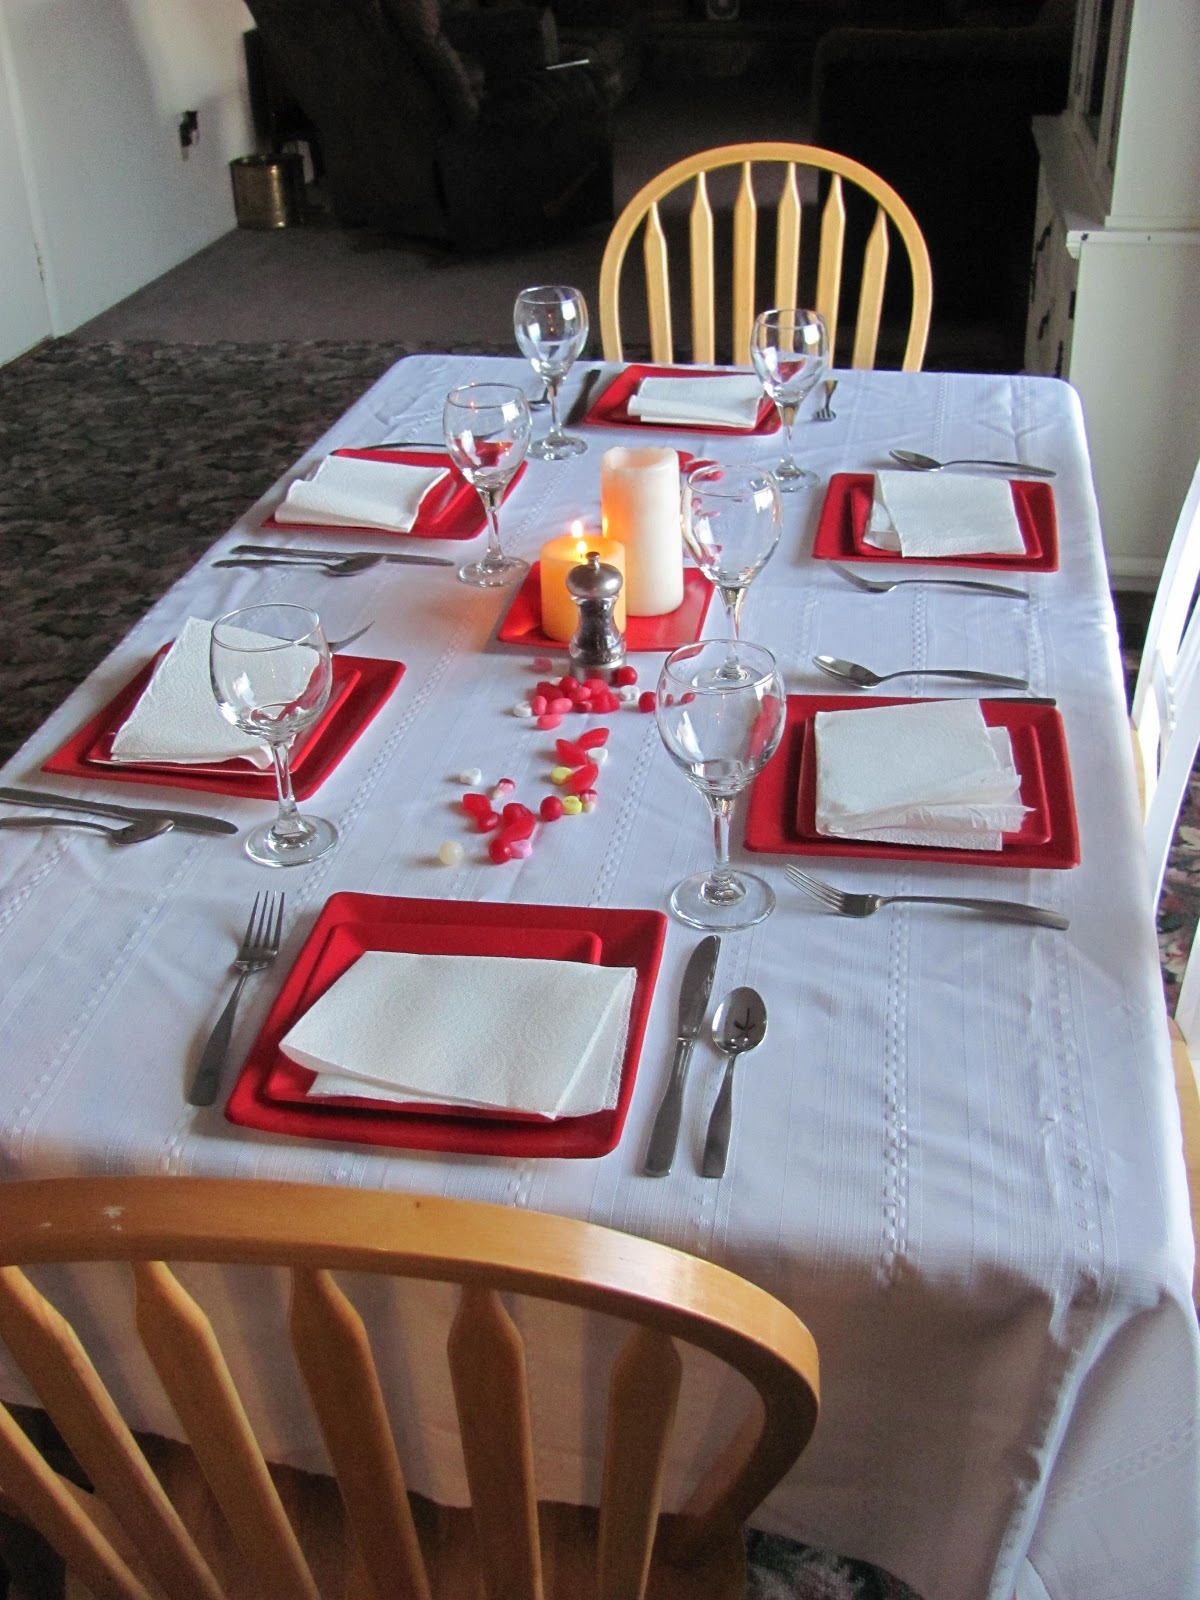
Don't you love my fancy china?
Last year my yummy valentine was mini-meatloaves (with ketchup on top shaped in a heart), mashed potatoes (with heart-shaped pieces of cheese on top), and kiwi and strawberry slices (which almost look like hearts if you really use your imagination).

This year I stepped it up a notch and I'm not sure if I'll ever be able to top it (even with heart-shaped cheese).


My Yummy Valentine 2013 Menu:

Drink:
Personal choice (everyone was thrilled to be allowed to drink soda)

Appetizer:
Caesar salad (and regular salad for Dee)

Main course:
New York Steak with a garlic/parsley compound butter
Steamed Snow King Crab legs (so sweet and salty already, no butter necessary)
Creamy Garlic Mashed Potatoes
Roasted Asparagus
Garlic Cheddar Biscuits (made from scratch)

Dessert:
Flan
Valentine's candy


Not to toot my own horn, but the food was DELICIOUS! Joe prepared the steak perfectly--it was tender and tasty--and I made everything else. This was the first time I've ever made garlic mashed potatoes or prepared crab legs. If I had known how easy both of these are to make...I would've been doing this for years! I'm a big fan of crab meat, but because of the expense rarely eat it at a restaurant. This was our children's first experience with crab and they really liked it too. I do believe we will be having more crab legs at home in the future.

The kids trying to figure out how to get the crab meat out of the shells.

The flan was so-so. I used the recipe out of my Better Homes and Gardens cookbook. It was underwhelming and almost tasteless. I'll have to try a different recipe next time. Or find a sweet little old Mexican lady to make it for me.

While everyone really liked the food, it was the table that was the highlight for my children. I spread out a tablecloth (a true rarity at our house) and used some special square paper plates I found at the dollar store. I gathered a few candles for the middle and spread some valentine candy down the length of the table. Not incredibly fancy, but something out of the ordinary.


But the crowning touch was the goblets. The kids were over-the-moon about them. And that's exactly why I bought them for our dinner. How often do you get to drink out of a goblet? I remember being pretty thrilled with the chance to swig out of stemware when I was a kid too. It's the little things that are magical. (And thank you, Dollar Store, for relieving any anxiety over possibly broken goblets. "No worries. It was only a dollar.")

The fancy table inspired the womenfolk to get gussied up. All the girls put on their dresses and "jewels".

It was a lovely dinner for a perfectly lovely way to spend an evening of love with the love of my life and the four little loves that are a result of our love! LOVE! LOVE! LOVE!

2.12.2013

No Bake Cookies (Dairy and Gluten Free!)


No Bake Cookies. Cow Pie Cookies. Gorilla Poop.

Call them what you will, these little treats are too yummy and too easy to whip up. And yes, I do say "too easy" as in "too easy to completely destroy my healthy eating plans". They're packed full of sugar and peanut butter and that's probably why they taste so darn good.

I hear there is a healthier--yet still delicious--recipe out there disguised under the name "Energy Bites". I intend to give them a try on a day when I have a little more willpower. But today we're making No Bakes and I'm wandering down Memory Lane as this was one of the first recipes I remember making on my own as a kid.

Now that I have kids of my own, things are a tad more complicated. With one that can't have milk and another that can't have gluten, I look for ways to make my old favorite recipes work. With a little butter-flavored shortening, some almond milk, and a lot of gluten-free oats this one WORKS!

Gluten Free/Dairy Free No Bake Cookies:
(Adapted from Six Sisters' Stuff No Bake Cookies recipe)

In a medium saucepan, mix and bring to a boil for one minute:
2 Cups sugar
2 TBSP shortening (or butter)
2 TBSP cocoa
1/2 cup almond milk (or soy milk or cow's milk)

Remove from stove top and add:
1/4 tsp salt
1/2 tsp vanilla
3/4 cup peanut butter (crunchy or creamy)

Mix ingredients until most of peanut butter is combined.

Add 2 cups of Quick Rolled Oats (Gluten Free) and mix until all is evenly incorporated. Drop by spoonfuls onto wax paper on counter top. Cookies will "set up" as they cool.  

I don't understand how this works, but these cookies taste even better the day after they are made. My advice? Make a double batch so you have more for tomorrow. ;)

P.S. Make sure to visit my weight loss blog for the healthier Energy Bites recipe.

5.23.2012

A Happy to Be Gluten Free Recipe: BBQ Chicken Salad


I suppose it's cheating to post this recipe on the blog, but I have no shame...I'm posting it anyway. This recipe is hardly new or inventive or complex. It's as simple as it gets, but it's healthy, easy, gluten free, and dairy free. It just doesn't get any better than that at our house!

BBQ Chicken Salad
chicken breasts
Sweet Baby Ray's BBQ sauce
lettuce
canned black beans
canned corn
tomatoes
olives
onions
cheese
tortilla chips
Ranch salad dressing
more BBQ sauce
sour cream
avocado
WHATEVER you like on your salad!

In the morning, throw a few chicken breasts in the crock pot along with some Sweet Baby Ray's BBQ sauce (gluten free!). Set on low and fuh-get-about-it.

As dinner time approaches, set all your salad toppings in bowls on the table. Rinse the beans and corn after opening and draining the cans. Chop up the tomatoes, grate the cheese, mix up the sour cream. You get the idea.

After sitting in the crock pot all day the chicken is tender and flavorful. Stir it around to shred it up.

Bring it to the table and dinner is served. Everyone can make their salad to their own liking.

Personally, I like to skip the cheese, olives, and sour cream (more calories than I need by dinnertime). Instead I mix together a little BBQ sauce and Ranch in a small bowl and spread it over my salad. It makes a great salad dressing.  (Obviously those who are dairy free need to skip the Ranch and cheese.) I also crush tortilla chips over the top to give it a little extra crunch. Lots of tomatoes and black beans for me and my tummy is happy. As is my daily calorie allowance too.

5.15.2012

Jar Love #76: Homemade Taco Seasoning


Hi. My name is Evelyn. And I am addicted to jars. More specifically canning jars. Even more specifically, canning jars of the Kerr, Mason, and Ball persuasion. And if you want to get very specific, antique jars just about send me over the edge.

It's not a sickness.

They're useful. And pretty. And really useful in so many ways. And really pretty. In so many ways.

(Am I the only weirdo out there who's heart starts racing a bit at the sight of glass jars? Come on, fellow jar addicts. Give a girl a little love.)

Don't get the obsession? Allow me to share one of the uses for those empty jars: homemade taco seasoning!

For years I have purchased ready-made taco seasoning in the little packets as well as in bulk to make tacos, nachos, burritos, taco soup, etc. But it finally dawned on me recently (and more recently than I care to share) that the ready-made taco seasoning often has dairy and wheat ingredients, besides a whole bunch of other unmentionable stuff. Big no-nos for dairy allergies, Celiac Disease, and dieting.

I have to admit (for I am full of confessions today) that I initially assumed we would no longer be able to enjoy Mexican food as a family. Welp. Add one more thing to the "can't" list. *grumble*

Did you know you can make your own taco seasoning???

I didn't.

In hindsight, I feel pretty silly admitting that I didn't know you could make your own taco seasoning. Really, I'm not stupid. Way back when I had a 3.7 GPA and I did get a 28 on my ACTs. Both times I took it. But sheesh, I can be pretty slow about things sometimes.

Enough about me and my molasses brain...(By the way, I blame the kids. They sucked the smarts right out of me with each pregnancy and all the subsequent sleep deprivation. I sure hope they enjoy all those brains I utilized once upon a time.)

Homemade taco seasoning! You can find lots of recipes out there in Google Land. From the gourmet to the budget savvy. Here's the link for the one I am using lately. It's not too spicy for the kids. Plus, this blogger comes from the same mold I do. That being the jar obsessed mold.

Homemade Taco Seasoning Mix:
1/2 cup chili powder
1/4 cup onion powder
1/8 cup ground cumin
1 Tablespoon garlic powder
1 Tablespoon paprika
1 Tablespoon kosher salt

Dump all your taco seasoning mix ingredients in the jar, shake, and store in your cupboard. Use 3 TBSP of mix per pound of ground beef.

No stress! No mess! No waste! And it just looks so cute! At least to this "jar head".

More jar love to come...Mother's Day Sugar Scrub!

4.30.2012

Hunter. Gatherer. What's for Dinner???


I don't know if it is true, but I feel like I have spent the majority of my Monday with food. Thinking about food. Planning about food. Searching food out. In my house and then again in the store--Make that storeS. Pulling junk food out of my begging children's hands. Loading food into my cart. Unloading food on to the conveyor belt. Loading food again into my cart. Only to unload in my car. Reload. Unload. Dating food (as in writing the date on the package of food and not engaging romantically with my groceries. Although...I nearly fell head over heels for a carton of ice cream back in the freezer section). Storing food. Cramming food into the deep dark recesses of my freezer, fridge, and storage room. Handing food to starving kids. Cramming food into my own mouth...

Two weeks of meal planning, four different grocery stores, and $200 later...

...I was ready to pay a restaraunt to make dinner tonight. Which I did. Shame, shame.

Alright, alright. One last hurrah before two weeks of cooking all that food I so diligently secured in my home.

I am hunter-gatherer. Hear me roar.

This meal planning business burns time like politicans burn money. But man oh man, do preparation and planning ever preserve me from nightly pain. In feeding a child who is allergic to milk and another child with Celiac Disease, weekly meal planning is vital. I have found, through a great deal of trial and an even larger amount of error, that if I am prepared, I shall not fear when dinner time rolls around every night.

Anyone need some ideas? I'm sharing my two-week meal plan and linking up to the wonderful websites that give me new and spectacular ideas when it comes to feeding my family gluten and dairy free. My current favorites are Cooking Gluten (& Dairy Free) and EZ Gluten Free. There are even a few of my own recipes (adapations made where needed to keep my little family safe).

Monday (30): Gluten/Dairy Free Beef Stroganoff Eat Out as a Family Night
Tuesday (1): Gluten/Dairy Free Beef Stroganoff
Wednesday (2): Chicken Noodle Soup (I just use my own homemade recipe. When it comes to the point of adding the frozen egg noodles, I ladle some out into a separate pot and add gluten free noodles for Elle. The rest of us get to slurp down those delicious darn-near-as-good-as-homemade noodles.)
Thursday (3): Chicken Ranch Tacos (Dairy/Gluten Free)
Friday (4): Steak, baked potatoes, roasted asparagus
Saturday (5): Date Night <---A girl can dream...Nachos (Feliz Cinco Day Mayo!)
Sunday (6): Pulled Pork BBQ Sandwiches, homemade potato salad, watermelon

Monday (7): Chicken Chimichangas
Tuesday (8): BLTs, fresh fruits and veggies
Wednesday (9): Oven Baked Chicken Parmesan, green salad
Thursday (10): Beef Stew, homemade cheddar biscuits
Friday (11): BBQ Chicken Pizza
Saturday: Wild Card (leftovers or popcorn)
Sunday: Impossible Mini Bacon Cheeseburger Pies (Dairy/Gluten Free), oven fries, veggies

To all you moms/hunter-gatherers out there...Good luck and may the fork be with you!

2.01.2012

A Happy to Be Gluten Free Recipe {Semi-Homemade Chicken Stir-Fry}

One of my New Year's resolutions this year is to have dinner on the table every night for my family. I whined about it a few weeks ago. Since I got that off my chest I've been trying to be a little less whiny and a little more proactive. Because let's be honest, whining only gets you so far, right?

Up to this point I have been sticking with a lot of things we typically have for dinner, only adapting it as needed. I imagine I'll grow more adventurous as the year goes on. As I wander through this little learning curve I thought I might post some of the things I'm making for dinner. I am cooking for myself (a mom who is on a weight loss journey), a baby, a "normal" daughter (take that "normal" with a grain of salt, would you?), a daughter who has Celiac, and a son who is very allergic to dairy and just recently discovered might also be sensitive to wheat. He's not growing so we are experimenting with a gluten free diet for awhile to see if it will help him. Wish us luck!

The first meal plan in this series of "Happy to Be Gluten Free" (there's gotta be a silver lining here somewhere; maybe in the very back of the pantry...) is Semi-Homemade Chicken Stir-Fry.


This is one of the meals we have when Daddy's out of town. He's not the biggest fan of this dish. Something about all those green veggies and lean protein. But everyone else in the family LOVES this meal. Whenever I pull that stir-fry package out of the freezer the kids begin jumping up and down squealing with joy. Who knew veggies were something to get excited about? My kids are actually really good about eating their vegetables, but I think it's the prospect of soy sauce that makes this dinner so appealing to them. They LOVE their soy sauce.


Unfortunately soy sauce is rather infamous for not being gluten free. I'm still researching this one out and I haven't found a black and white answer yet. For now I am using this brand of soy sauce that I found at my local Winco. I have searched and searched over the ingredients list and cannot see anything on there about wheat or gluten. So I use it. So far, so good.

I'm just waiting for someone to leave me a comment saying it is NOT gluten free, but if that's the case, please, dear reader, direct me to a brand that is. And thanks ahead of time!

Semi-Homemade Chicken Stir-Fry

1 package of Broccoli Stir-Fry (find at your local friendly Walmart in the freezer section. Cost is less than $2 a package and they usually carry several varieties.)

1.5 cups uncooked rice
1 lb chicken breast, chopped into chunks (You could easily use beef or shrimp too.)
vegetable oil
soy sauce (gluten free!)

First things first, I start my rice cooking. It takes about 20 minutes to cook rice. The rest of dinner can be prepared in that time.

Heat a little oil in a skillet and cook the chicken. Pour a little soy sauce over the chicken as it's cooking.

Remove chicken from skillet. Add a little more oil if pan is dry. Turn up heat to medium high, make sure oil is hot, and stir-fry your veggies. Make sure to read the package directions, but this takes about 7 to 10 minutes.

Combine chicken and veggies in skillet and serve over rice.

Simple, easy, inexpensive, fast, healthy (around 350 calories per serving), gluten free, dairy free, and delicious. What's not to love? I realize I'm no Giada or Julia Childs, but this meal works for our family. Let me know if it works for your family too, won't you?

6.03.2011

Of Chums and Chicken, Craisin, and Cashew Bowtie Pasta Salad

My dear friend Carli came for a visit yesterday. We've been trying to plan a get-together since...Well since I moved to Utah four months ago! It really was getting rather ridiculous that we couldn't seem to coordinate our schedules together to make it happen.

Psst...

It was 93% my fault.

With Carli's help, I finally admitted something to myself: I am busy. I went and got a life after all. That's all well and good, but it makes me sad to be "too busy" to simply have a lunch/play date with a friend. There's something wrong with the world when you begin to feel like you don't have time for friends.

I'm glad we finally made it work out. Thanks for coming Carli!

And thanks for being so patient with me and my fickle scheduling skills.

And thanks for liking the lunch I made!


Anyone want the recipe???

This is a great spring/summer salad! My little sister Camille served this at her wedding reception. It's a perfect combination of savory and sweet, crunchy and soft. If you give it a try let me know how you like it!

Chicken, Craisin, and Cashew Bow-Tie Pasta Salad or 3 C Salad

4 cups cooked chicken breasts, diced (*Feeling lazy? Use an already-cooked rotisserie chicken from the store. Just pull off the meat and dice it.)
6 cups bow-tie pasta, cooked al-dente (*I think the trick to this salad is to make sure the pasta is really, truly al dente. Cook it until it seems to still have a bit of "crunch" to it in the middle. Trust me. It works!)
1 and 1/2 cups green grapes, sliced in half

1 and 1/2 cups red grapes, sliced in half
2 (5 ounce) cans water chestnuts, drained and quartered
(*eh...I would leave this out.)
1 (10 ounce) can pineapple tidbits, drained (*Leave this out too. Or don't. Whatever.)
2 cups celery, thinly sliced
1/2 cup scallions, thinly sliced
(green onions)
2 cups cashews, whole and halves
2 cups craisins
(dried cranberries)

Dressing:

1 (16 ounce) bottle Hidden Valley brand coleslaw dressing
1/2 cup mayonnaise
1/2 cup Miracle Whip

How to:
(Hint: This a great salad to make the night before. Giving it time to soak up the dressing makes a world of difference.)

1. In a large bowl mix all salad ingredients together, except cashews and craisins
2. Whip together dressing ingredients.
3. Toss dressing with the mixture in the large bowl.
4. Mix in cashews and craisins right before serving.

5.24.2011

Peanut Butter Candy (Like They Made in Elementary School!)


Back in my elementary school days all the kids were absolutely nuts about this stuff called Peanut Butter Candy.

Me...Not so much.

I was everybody's best friend in the cafeteria on Peanut Butter Candy days because everybody wanted to trade something for that distasteful little chunk of peanut butter and chocolate.

Funny how your tastes change as you get older.

When we blessed Cee a couple of months back, my cousin Melissa (who eats gluten-free by the way) brought a panful of Peanut Butter Candy to the luncheon afterwards. People were practically elbowing each other out of the way to get to that pan of chocolaty, peanut buttery goodness. The little kids hardly stood a chance, unless they could reach from under the table and bypass the crowd of adults vying for a piece...or two...or three.

After the blessing and luncheon were over and everyone had gone on their merry ways, Joe and I talked about what a beautiful day it had been. Sure, we blessed our baby and all, but his lasting impression of the day???

Must. Have. Peanut. Butter. Candy. Recipe.

So I asked my cousin for it.

If I had only known how simple it was to make...I'd probably be trying to lose twice as much weight as I already am.

I made some yesterday. In fact I made a double batch yesterday. A pretty rotten thing to do to myself whilst in the middle of a weight loss journey. But I was a very good girl. I ate a few pieces, sent half with my sister who was visiting for the day, and half to the neighbors who had sent over some roast beef for dinner the night before. (Never return a dish empty, I say.)

Since I can't make a habit out of making these little bits of heaven, at least I can share some heaven with you.

Elementary School Peanut Butter Candy

3 cups Rice Chex cereal (for those who eat gluten-free) or Rice Crispies cereal, crushed (I've tried both ways. I thought the Chex made it a little more crunchy than the Rice Krispies did.)
1 cup creamy peanut butter (I bet you could use crunchy too.)
2 TBSP softened butter
1 and 1/4 cup powdered sugar or confectioner's sugar
Chocolate chips
(I use semi-sweet, but you could use milk chocolate.)

Combine first four ingredients in one bowl. Mix thoroughly then press firmly into 9x9 pan.

Melt chocolate chips in double boiler: Fill bottom of pot with inch of water. Heat to boiling. Place glass bowl over pot of water and pour in chocolate chips. Turn down heat on pot. Chocolate chips will melt quickly. Stir every so often until chocolate is completely melted and creamy.

Pour chocolate on peanut butter layer. Smooth out chocolate. Then just try to resist Peanut Butter Candy while the chocolate cools and hardens. Place in fridge hoping to speed up the process.

Devour. Or share with your neighbors after daintily eating a piece or two...or...Don't.

I'm linking up my peanut buttery, chocolaty memories, recipe, and good behavior with Amy at Involuntary Smiles for Time Out Tuesday.


12.09.2010

Joe Dun Rill Gud on Hiz Tesst

Joe is back in town today {finally!} after taking and passing his big work test on Tuesday.

He was pretty nervous about passing, but I KNEW he would. He's one smart cookie, even if he says otherwise. Don't let the guy fool ya'. He's too humble for his own good sometimes. (It's one of the things I really love about him.)

I don't know much about what all this test entailed. Only that once passed he would receive a bonus, a raise, and important looking marks on his resume. Good enough for me!

So today we are celebrating his triumph with a holiday breakfast.


My mom has made Breakfast Casserole for Thanksgiving or Christmas for as long as I can remember. I'm not sure why she does it or even where the recipe came from. All I know is it's a tradition that all the son-in-laws in our family L-O-V-E.

Joe missed out on Breakfast Casserole this Thanksgiving since he had to work. After passing his test with flying colors, I thought a little Thursday morning Breakfast Casserole was in order.

Breakfast Casserole

10 slices of white bread (with the crusts trimmed off)
1 cup grated cheddar cheese
9-10 eggs, beaten
1 can cream of mushroom soup
1 lb. link sausages (cut into thirds)
1 and ½ cups milk
¾ tsp dry mustard
½ green pepper, chopped (optional, we have NEVER added this)
4 green onions, chopped (optional, again we have NEVER added this)

Grease a 9 x 13 casserole dish. Cover the bottom with bread slices so that you have one even layer of bread. Sprinkle sausage and grated cheese over bread. (No need to pre-cook the sausage links). Mix eggs, milk, soup, mustard, onions, and peppers. Pour mixture over bread, cheese, and sausage.

Cover lightly and refrigerate overnight. (This recipe can be made the morning of too. It’s just nice to save yourself the time spent slaving away in the kitchen while everyone else is enjoying the holiday fun elsewhere.) In the morning bake at 300 degrees for 1 and ½ hours.

Extra enjoyable and traditional with cherry turnovers on the side.

12.02.2010

AFTER the Happily Ever After (A Recipe)


Once upon a time...

There was an incredibly beautiful young girl named Evelyn Cinderella or Snow White or Esmerelda or something fluffy like that. She was very kind and oh-so-generous and super duper talented, not to mention one crazy cleaning machine. She was very blessed but this girl yearned for more.

She wanted a fairy tale ending. A fairy tale that came complete with one handsome prince and one comfortable cottage (she was willing to wait for the castle to come) that would be absolutely brimming full of babies.

And guess what? Our fair maiden got exactly what she asked for: a fairy tale ending.

Only problem is she didn't realize "ending" really meant "beginning".

Who knew there was a big fat AFTER to the Happily Ever After?

Some days that "after" part can get a little intense and our fair maiden tries to remember exactly what she had in mind for herself those many years ago. She felt quite certain she had been destined to be a skinny, saucy, stellar housekeeper, wife, and mother.

Hmm...About that...

Like any good story, you can trust that our maiden/heroine will continue to persevere and reach for her fairy tale ENDING.

But some days, she likes to just sit in her cluttered, chaotic cottage and reminisce about those good ol' days of romance and peace and quiet and pumpkin carriages. And on those days she says, "Ahhh, forget it! Let's eat cake!"


All the credit for this idea goes to Mormon Mommy Blogs, but I just had to give it a try. Look how fun it is! And who cares if Thanksgiving is over?

For this recipe/craft/centerpiece you will need:

-2 cake mixes (pick your favorite flavor!)
-supplies to make cake mixes (eggs, water, oil)
-2 bundt pans
-frosting (you could make your own or buy the pre-made stuff)
-food coloring
-an ice cream cone
-cake plate


Mix up both cake mixes. Let your minions peasants crowned jewels in on the fun!


Pour one cake mix batter in each bundt pan and bake according to box directions.


Allow cakes to cool completely before decorating. Mix up some orange frosting.


Cut the tops (or are those the bottoms?) off of each bundt cake making sure they are level.


Smear some frosting on one cake to create a "glue".


Stack and match up cakes.


Carefully spread frosting over entire pumpkin cake. (In hindsight I may not have used such a dark cake mix that can "peek through" and I would have tried to make my frosting a much more brilliant orange.)


Place cake on a decorative cake plate. I don't have a cake plate so I just used an upside down decorative leaf plate. Prop an ice cream cone in the center as the stem. I dampened the ice cream cone and sprinkled green crystal sprinkles on it. I added some fake green leaves I had from another project.

...And they ate happily ever after!

11.21.2010

Sweet Sticky Buns of Goodness

Elle has a fever and a nasty little case of croup.
All the kids are hacking up lungs.
Joe is long gone to work until late tonight.
It snowed a couple of inches last night and continues to collect. (YIPPEE!!)

So...We are skipping church and sticking close to the hearth today.

How fortunate that I had the foresight to make up a batch of Sticky Buns last night...

I have posted a recipe called Monkey Bread before. Every time I talk about Monkey Bread people assume it is this recipe, what my family likes to call Sticky Buns. Let there be no confusion; they are two totally different culinary concoctions.

Sticky Buns (NOT to be confused with Monkey Bread)

(This ingredient list makes ONE pan of Sticky Buns, but I have never made just one pan. I always double this recipe making two pans.)

18 frozen Rhoads rolls


One 3.5 oz package butterscotch pudding NON-instant (also called Cook N’ Serve)


½ cup brown sugar, tightly packed
¼ cup margarine or butter
1 tsp cinnamon
Chopped pecans or walnuts

1. Grease a Bundt pan by spraying non-stick cooking spray all over inside of pan.

2. Spread chopped nuts evenly over bottom of pan. (If Joe had his way, this step would be banished.)

3. Place frozen rolls evenly in pan on top of chopped nuts.

4. Sprinkle pudding on frozen rolls.

5. Melt margarine in microwave.

6. Mix cinnamon and brown sugar into melted margarine until thoroughly distributed.

7. Pour margarine, sugar, and cinnamon mixture over frozen rolls in pan.


8. Cover with a clean kitchen towel and let sit to defrost and raise overnight.


9. In the morning, preheat oven to 350 degrees. Bake Sticky Buns for 20 minutes. Make sure buns are neither doughy nor burnt.

10. Remove from oven and cover Bundt pan with a large plate. Turn over carefully, transferring the Sticky Buns onto the plate.


Dive in, but try to be careful not to burn your mouth in your haste to eat these delicious breakfast goodies.

11.18.2010

Chartreuse* Chile Chicken Chimichangas


*(chartreuse: green)

These days I cannot seem to get enough of spicy food during pregnancy, especially spicy Mexican food. Even as I am typing these words my mouth is literally watering for some salsa and chips from a local Mexican restaurant. I would make a run over there right now, jammies and all, but I can’t show my face at that particular restaurant for another few days.

I have already been there twice this week. I don’t know how I feel about being on a first name basis with my spicy food suppliers.

Thanks to heartburn during pregnancy I can’t get too crazy with the spicy food. Eating something too spicy automatically signs me up for a night of suffering and remorse. So I play it safe. No jalapenos or habaneros for this girl, but bring on the salsa and chicken fajitas! I think I could eat both five days a week.

What about the other two days a week?

Well, no sense in getting carried away now is there?

So, what is a girl to do for those two nights she isn’t hovering around the entrance to her local Mexican restaurant?

Make green ( or chartreuse...isn't that fun word?) chili chicken chimichangas at home of course!

Shall I share my little pregnancy food cravings recipe with you? Claro que si!

Green Chile Chicken Chimichangas
(Thanks to Cathy Roberts for the recipe!)

1. Place 4 frozen chicken breasts in a pot and cover with water. Place on stove and heat to boiling. Cover with lid and turn down heat to a simmer. Cook until chicken breasts are cooked through.

2. Pour water off chicken. Trim chicken (I cannot stand finding “mystery objects” in my meat so I trim every bit of cartilage, fat, and ick that I see). Shred chicken well, leaving it in the same pot it was cooked in; no need to dirty more dishes than necessary.

3. Pour one can of green chile enchilada sauce into shredded chicken and stir. Place on low heat to warm through.

4. Heat up one can of refried beans in a non-stick skillet.

5. Heat oil in a fryer to 350 degrees F. I love my Fry Daddy, probably more than I should admit! It contains the mess and the smell of burnt oil. But if you don’t have one, you can just heat up some oil in a skillet.

6. Construct chimichangas by using large flour tortillas. Smear a thin layer of refried beans in middle. Sprinkle generously with shredded cheddar cheese. Spread chicken chile mixture on top of cheese layer.

7. Tuck and wrap tortilla tightly and securely. I usually use toothpicks to secure the tortilla flap.

8. Place chimi in hot oil and rotate often allowing it to fry up evenly. Usually about 3 minutes.


9. Place chimi on plate with paper towels to drain and cool.

10. Enjoy with sour cream, salsa, hot sauce, or guacamole! Delicioso!

Obviously this recipe can be changed to your tastes and preferences. You could make up some rice and add that. You could leave off the beans. You could use black beans instead of refried. Whatever pleases your particular palate!

Got an awesome variation? Do share! Maybe I could cut my Mexican restaurant stalking/habit back another night.

11.02.2010

How to Make Your Way to a Man's Heart

And that, my friends, is most definitely through his stomach. At least in Joe's case. And I must love him a lot because he has gained a good 70 pounds since our wedding day. As for my weight gain...well, let's not stray into dangerous waters today, shall we?

Our little how-to for today is how to make one of Joe's favorite recipes: Homemade Pasta Carbonara. Simple to make. Fattening beyond belief. Delicious to the taste. Husband made blissfully happy.


Pasta Carbonara (8 servings)

5 cups (1 package) uncooked mostaccioli or penne pasta
1 package bacon, diced
1 jar (8 oz) whole mushrooms, drained
1 and 1/2 cups half and half cream
2/3 cup butter, cubed
2 tsp dried parsley flakes
2 tsp minced garlic
12-16 drops hot pepper sauce
1 tsp salt, optional
2/3 cup grated Parmesan cheese
1/2 cup sliced green onions, optional

1. Cook the pasta according to package directions.

2. In a large skillet, cook bacon over medium heat until crisp. Using a slotted spoon, remove to paper towels to drain.

3. Drain most of the drippings from pan. Brown mushrooms in drippings; remove to paper towels. (Side note: I can't find jarred mushrooms in my town. I bought a little basket of raw mushrooms, washed and sliced them up, and sauteed them. I thought they worked just as well as the jarred mushrooms.)

4. Add cream, butter, parsley, garlic, pepper sauce and salt if desired to the skillet; cook and stir over medium heat until butter is melted.

5. Drain pasta; add to cream mixture. Stir in the bacon, mushrooms and cheese; heat through.
6. Remove from the heat.

7. Sprinkle with green onions.


Serve with a heaping bowl of plain green lettuce and carrots so you can say it's a balanced meal with a straight face. A few kisses sprinkled through out might not hurt either.

Who needs marriage counseling with a recipe like this?

Make sure to check back tomorrow for another how-to! Maybe how to make maternity jeans look sexy when you may or may not be pregnant and just need something that fits after eating too much Pasta Carbonara?

10.14.2010

Yet Another Piece of Evidence that Blogging is...

COOL!
the best!
uplifting!
cheerful!
connecting!
lasting!

worthwhile.

Look what I found in my mailbox today...


My bloggy friend, Myya, mentioned awhile ago how much she loved these cool little pre-measured spices and recipe cards from McCormick. Always on the lookout for an easier and new way to approach dinner, I've kept my eye out for them every time I go to the grocery store...to no avail.

I nonchalantly mentioned to her the other day that I had finally found some, just not the one she had raved about. I had no angle in telling her that. I mostly wanted her to know that I paid attention to the things she talked about.

Guess what? She pays attention too. Thank you so much Myya! And a homemade card to boot?! Your thoughtfulness made my day!

Unfortunately, Chicken Marsala according to McCormick will have to wait until another night since I didn't check the mail until after my huge grocery shopping trip today.

This is what's for dinner at our house tonight:


Summer Sausage Supper is so simple and scrumptious so stop slouching and saute some for supper so you can slowly slurp it, silly.

(Well, I'm sure that's enough alliteration for several blogs. And not very good alliteration if truth be told.)

This easy recipe is a favorite of my husband's. He is a sausage lover. I am not. Yet, we can agree this is a delicious meal. There you have it. Ssssssss...

Summer Sausage Supper
(taken from Cooking for Two magazine and doubled)
Makes 4 servings

1 lb smoked sausage, sliced
2/3 cup chopped green pepper
1/2 cup chopped onion
1 large garlic clove, minced
1 tsp dried oregano
1 tsp dried basil
2 TBSP olive oil
1 and 1/2 cup V8 juice
3 cups hot cooked rice

In a large skillet, saute the sausage, green peppers, onion, garlic, oregano and basil in oil until vegetables are crisp-tender.

Add V8 juice; bring to a boil. Reduce heat; simmer, uncovered, for 7-8 minutes or until thickened.

Serve with rice. (I bet noodles would be yummy too).


P.S. While we are on the subject of dinner...I tried a broccoli cheese soup mix from Bear Creek Country Kitchens brand the other day that is more than quite decent. And SUPER easy! I steamed up several crowns of fresh broccoli and added them in once the soup was done. This obviously balances out the calorie content from the cheese part of the soup. Obviously.

I have yet to master the art of cheese soup. Mine always ends up super gritty. Hardly palatable. But this product takes all the work and worry out of it for me. I'm not getting compensated for telling you how great this product is...I just thought I'd share a dinner tip I found. Try it and let me know what you think. (By the way, we tried the Wild Rice version and weren't very impressed. Stick with the broccoli cheese.)

And if anyone out there can school me on how to make edible cheese soup...I'm all ears!

Happy Dinner!

10.04.2010

A Monday Happy List

Why is that Mondays get such a bad wrap? They can't help that they have to follow up the weekend. This Monday has been pretty kind to me and mine in our neck of the woods. This is what I am happy about today:

:) Kissing and loving on my new little nephew over the weekend. There is just a small piece of heaven that comes tagging along with a newborn. It is wonderful! Thanks for sharing him with us, Camille and Tyler! We kind of like him.

:) Three kids that slept most of the four and a half hour drive home last night, giving Joe and me a chance to catch up on our "spousal communication". It was almost as good as a date night!

:) Fall decided to show up today! What a lovely, gray, murky, rainy day. Soup and bread are in order! Now if I could only learn how to make a decent homemade cheese soup...

:) Waking up this morning to a sleeping toddler head tucked firmly into my arm pit.

:) What great teachers Dee and Jeigh have! I'm not too fond of the house we have, but I sure am glad it is in the school district it is.

:) Being busy all morning. We got a late start and it was a little hectic, but it is always good to be busy doing good things.

:) Sipping on a mug of hot chocolate.

:) Thinking about new prospects and trailer-free days.

:) Remembering it's officially candy corn season! (And trying to figure out a project for Sami's October Symfully Sweet Saturday. Any bright ideas??)

:) A lunch of tuna fish sandwich (cut in triangles of course), chips, and a big fat dill pickle. YUM!

:) Hearing Elle's vocabulary exploding. I love all the little unprovoked "Thank you, Mommy"s and other new phrases!

:) Watching Dee and Jeigh cuddled up on the couch "reading" a book together, but doing more giggling than actual reading.

:) Thinking about this blogger's great idea: Queen for the Day? Awesome! I know a few ladies who totally deserve this.

:) Knowing my husband is going to be super happy when he walks in the door tonight to the smell and sight of Monkey Bread.


Want the recipe?

Monkey Bread

2 cups very warm water
1/2 cup sugar
1 TBSP salt
1 TBSP yeast
3 cups flour
2 beaten eggs
3 more cups flour
4 TBSP oil
1 cube margarine

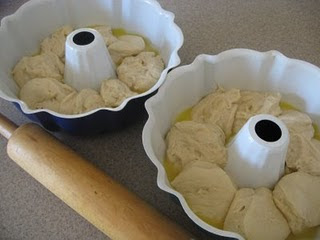
Mix warm water, sugar, salt, and yeast and let set until bubbly, then add eggs and 3 cups flour. Stir; do not beat. Add oil and 3 more cups flour. Stir again. It will be sticky. Cover and let rise until double. (I have just recently figured out that putting my pans in a warm place AND waiting an adequate amount of time makes a world of difference!). Roll out on floured surface. Cut in circles (I use one of my kitchen glasses to do this). Melt one cube margarine and pour into two Bundt pans. Stand circles up in Bundt pans (see picture below).


Let dough rise to top of pan (it may not reach top and that's okay). Bake both pans together at 350 degrees for 20-30 minutes or until golden brown on top. Turn upside-down on a plate to serve. (Recipe from my great-grandmother Jennie Champneys and aunt Jane Miles)

P.S. I have no idea why it's called Monkey Bread. All I know is it's delicious! That and kids, husbands, and missionaries scarf it down.

What is making you smile today???

MyHappyListButton

LinkWithin

Related Posts with Thumbnails