Last year I wrote a blog post on what to do to preserve all that naughty leftover Easter candy. This year, I thought I would make a video about it for Vlog Vednesday.
Same information as the blog post. This one goes out to all those "visual learners".

Showing posts with label food. Show all posts
Showing posts with label food. Show all posts

2.15.2013
My Yummy Valentine

I've noticed a developing trend in our home on Valentine's Day. In fact, I might even be bold enough to say we have a true "Day of Love" tradition! Ooo! I'm a sucker for a good tradition. Especially a tradition that involves food.
 For the past several years we have skipped the romantic dinner out for two and opted instead for a fun family dinner at home. Sure, this means more work for me as the primary food preparer in our home, but I find I quite enjoy it, especially as I feel this culinary contribution is my own special valentine to the ones I love the most. The way to your family's hearts are through their stomachs, right?
 |
| Don't you love my fancy china? |
This year I stepped it up a notch and I'm not sure if I'll ever be able to top it (even with heart-shaped cheese).
My Yummy Valentine 2013 Menu:
Drink:
Personal choice (everyone was thrilled to be allowed to drink soda)
Appetizer:
Caesar salad (and regular salad for Dee)
Main course:
New York Steak with a garlic/parsley compound butter
Steamed Snow King Crab legs (so sweet and salty already, no butter necessary)
Creamy Garlic Mashed Potatoes
Roasted Asparagus
Garlic Cheddar Biscuits (made from scratch)
Dessert:
Flan
Valentine's candy

Not to toot my own horn, but the food was DELICIOUS! Joe prepared the steak perfectly--it was tender and tasty--and I made everything else. This was the first time I've ever made garlic mashed potatoes or prepared crab legs. If I had known how easy both of these are to make...I would've been doing this for years! I'm a big fan of crab meat, but because of the expense rarely eat it at a restaurant. This was our children's first experience with crab and they really liked it too. I do believe we will be having more crab legs at home in the future.
 |
| The kids trying to figure out how to get the crab meat out of the shells. |
The flan was so-so. I used the recipe out of my Better Homes and Gardens cookbook. It was underwhelming and almost tasteless. I'll have to try a different recipe next time. Or find a sweet little old Mexican lady to make it for me.
While everyone really liked the food, it was the table that was the highlight for my children. I spread out a tablecloth (a true rarity at our house) and used some special square paper plates I found at the dollar store. I gathered a few candles for the middle and spread some valentine candy down the length of the table. Not incredibly fancy, but something out of the ordinary.
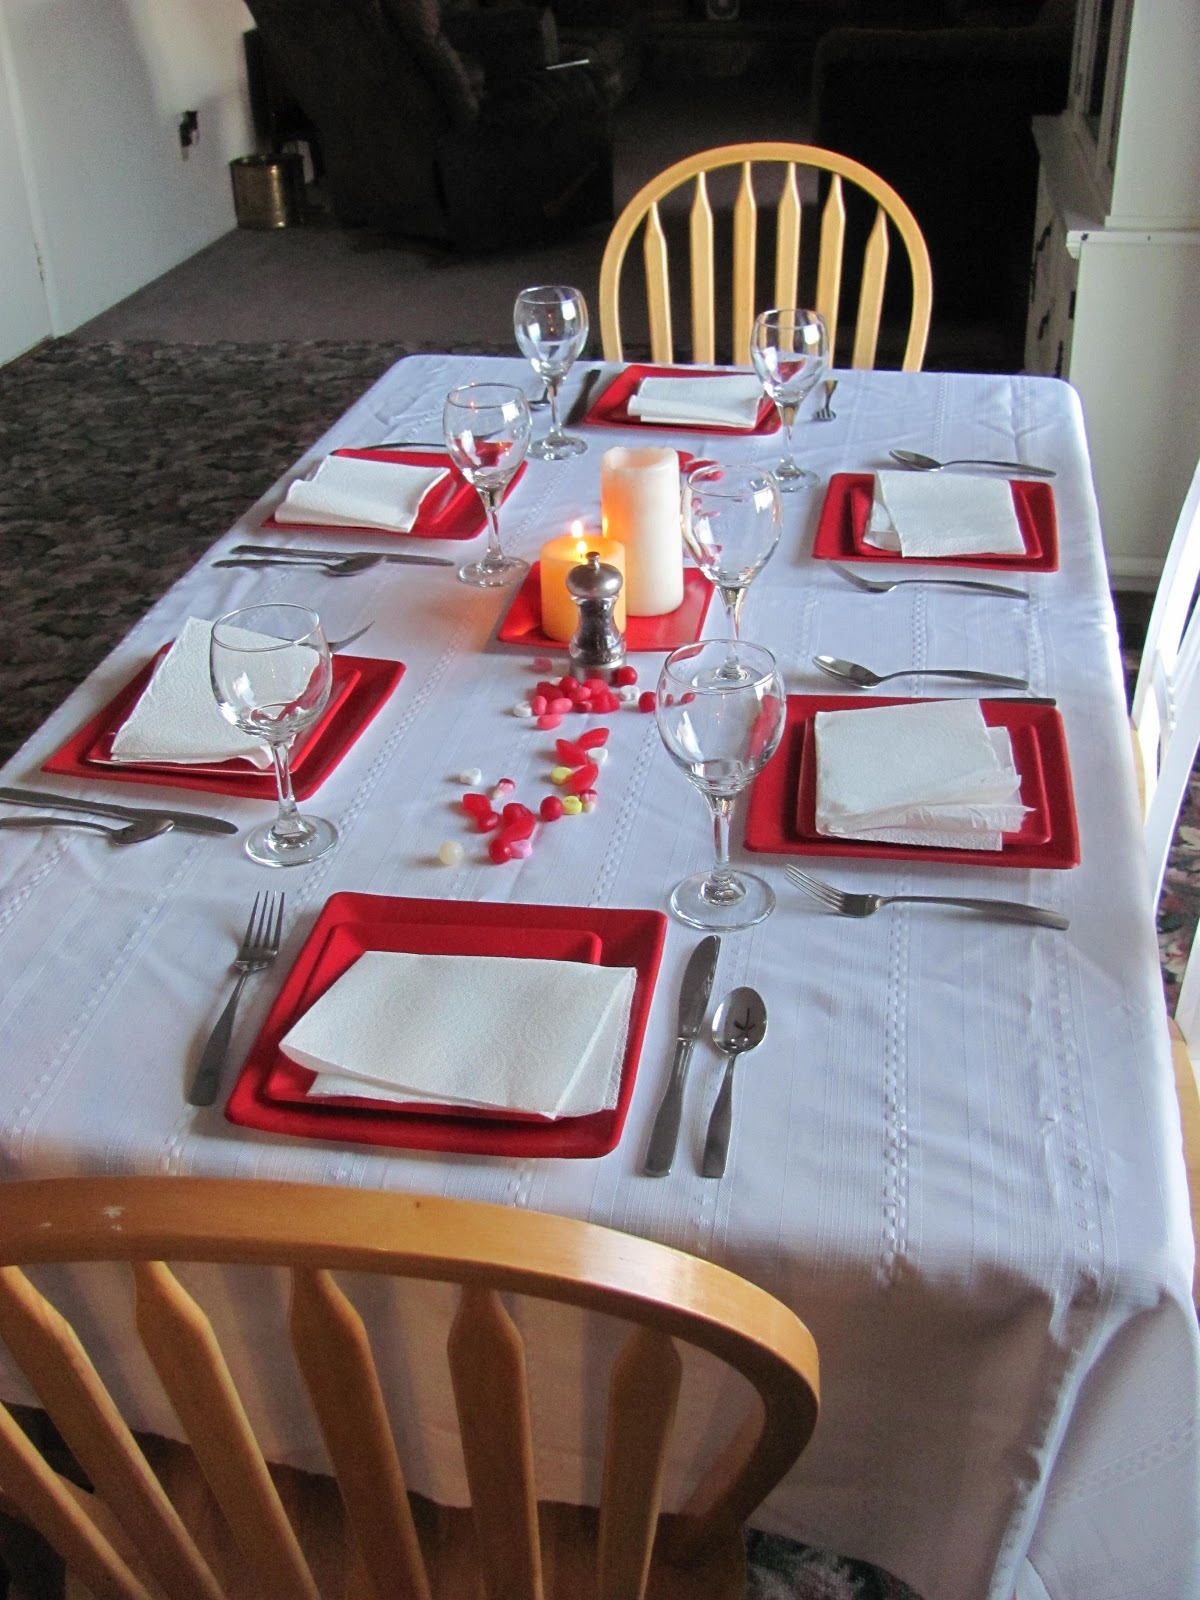

The fancy table inspired the womenfolk to get gussied up. All the girls put on their dresses and "jewels".
It was a lovely dinner for a perfectly lovely way to spend an evening of love with the love of my life and the four little loves that are a result of our love! LOVE! LOVE! LOVE!
4.30.2012
Hunter. Gatherer. What's for Dinner???

Two weeks of meal planning, four different grocery stores, and $200 later...
...I was ready to pay a restaraunt to make dinner tonight. Which I did. Shame, shame.
Alright, alright. One last hurrah before two weeks of cooking all that food I so diligently secured in my home.
I am hunter-gatherer. Hear me roar.
This meal planning business burns time like politicans burn money. But man oh man, do preparation and planning ever preserve me from nightly pain. In feeding a child who is allergic to milk and another child with Celiac Disease, weekly meal planning is vital. I have found, through a great deal of trial and an even larger amount of error, that if I am prepared, I shall not fear when dinner time rolls around every night.
Anyone need some ideas? I'm sharing my two-week meal plan and linking up to the wonderful websites that give me new and spectacular ideas when it comes to feeding my family gluten and dairy free. My current favorites are Cooking Gluten (& Dairy Free) and EZ Gluten Free. There are even a few of my own recipes (adapations made where needed to keep my little family safe).
Monday (30):
Tuesday (1): Gluten/Dairy Free Beef Stroganoff
Wednesday (2): Chicken Noodle Soup (I just use my own homemade recipe. When it comes to the point of adding the frozen egg noodles, I ladle some out into a separate pot and add gluten free noodles for Elle. The rest of us get to slurp down those delicious darn-near-as-good-as-homemade noodles.)
Thursday (3): Chicken Ranch Tacos (Dairy/Gluten Free)
Friday (4): Steak, baked potatoes, roasted asparagus
Saturday (5):
Sunday (6): Pulled Pork BBQ Sandwiches, homemade potato salad, watermelon
Monday (7): Chicken Chimichangas
Tuesday (8): BLTs, fresh fruits and veggies
Wednesday (9): Oven Baked Chicken Parmesan, green salad
Thursday (10): Beef Stew, homemade cheddar biscuits
Friday (11): BBQ Chicken Pizza
Saturday: Wild Card (leftovers or popcorn)
Sunday: Impossible Mini Bacon Cheeseburger Pies (Dairy/Gluten Free), oven fries, veggies
To all you moms/hunter-gatherers out there...Good luck and may the fork be with you!
4.17.2012
How to Preserve Leftover Easter Candy and Other Goodies

Last week I shared the success I had with preserving our leftover Easter candy. A few people asked me how I did it and, lucky you, I'm more than happy to share!
First, a disclaimer...I have no idea if this is the "right" way. There are actually several methods out there to dry packing and preserving food. This is just the way my sister and mom showed me how. They are pretty darn smart and resourceful women. I think we are in good hands.
You are going to need a few supplies to do this:

Leftover Easter candy (or Halloween or Christmas or chocolate chips or pretzels or cookies or whatever! Sky's the limit! Just nothing powdery; It gets sucked up in the tubing and out the lid and prevents sealing.)
Canning jars (Kerr, Ball, Mason are the best. I stock up on these at 50 cents/bottle every time I go to my local thrift store.)
Canning lids (You can find these at Walmart, other grocery stores, online, etc.)
Canning rings (They often come with the jars, but if they aren't look at Walmart and other stores. These aren't absolutely necessary, but they satisfy my obsessive compulsiveness, they double protect the sealing, and they just look nicer.)
A hair dryer (You can find this is in your local bathroom.)
A Food Saver/Ziploc Vacuum Pump gadget (I will explain how to rig this together.)
Tubing*** (Look at your local medical supply store or pharmacy.)

The Food Saver contraption (white lid looking thing) is actually an attachment for a bigger, more expensive machine. It would be awesome to have that machine, but my budget doesn't exactly allow for that right now. Fortunately, you can use a Ziploc Vacuum pump along with the Food Saver attachment to dry pack canning jars. Really!
My Food Saver attachment was a gift from a wise mom. Word on the street is that the Food Saver attachment is available at Walmart. I looked for it the other day and only saw the big machines. You can find the attachments for sale online, try the Food Saver website or Amazon.com. They come in wide mouth and regular mouth size.
You can find a Ziploc Vacuum Starter Kit at your local Walmart or grocery store.
To rig up your custom Food Saver/Ziploc Pump you need to take off the bottom rubber piece from the Ziploc pump that is used to vacuum out bags. Grab a milk jug lid off of an empty gallon milk jug and poke a small hole in the top, just big enough for the Food Saver tubing to fit snugly inside. The milk cap will fit perfectly over the end of the Ziploc pump.

Now use medical tape or duct tape or whatever you have to secure the milk cap on to the pump. Be certain that no air can leak from the hole in the lid or the edges of the lid or pump.
Stick the free end of the tubing*** into the Food Saver attachment and it's ready to use.

Clear as mud? If you have any questions just ask and I'll see what I can do to help!
Now, you need to prep your canning jars.

They need to be CLEAN and DRY. I wash mine with a bottle scrubber and a sink full of hot soapy water. A good rinse and a towel dry later, I use my blow dryer to make absolutely certain they are dry. Water could cause food contamination problems, so remember: A dry jar is a happy jar! Even if your husband laughs at you for blow drying jars in the kitchen...

After letting your jars cool completely (think melted chocolate if you don't), you can dump in whatever candy or goodies you have, leaving an inch of space from the top. Make sure to tap and twist your jar a few times to let the contents settle.

I had some really great coupons for these M&M candies that I wanted to use before they expired. But I had a ton of Easter candy that I just preserved. Normally I would have passed up the good deal on the M&Ms since I already had a bunch of candy sitting around, but by preserving them, I don't have to worry about them getting stale in the cupboard. (But between you and me, really...When have M&Ms ever been in the cupboard long enough to become "stale"? I know, I know. I'm laughing too.)
That's the beauty of this whole preservation thing! You can buy the holiday candy after the holiday, catching all the good deals, dry pack them at home and use them next year. They won't taste old and you will have saved money. Awesome, right?
Carefully place the canning lids on the jars.

Push the Food Saver contraption over the top of the jar with the lid on.

Turn once to secure on tightly. Pump a few times. If you hear a clicking noise and see the Food Saver moving up and down, you are doing it right. This is the sound of the lid sealing on to the jar. If you don't hear that noise, readjust the lid and Food Saver until you do. Make sure your jar top doesn't have any nicks or cracks or try a different lid if it still won't seal.
Pump 15 to 20 times total to make sure the lid is sealed. Remove the Food Saver and gently pull on it with your hands to double check.

Screw on canning ring. Write the date on the top.


Stare admiringly at your freshly "canned" goodies...

...And sleep well knowing you saved another bag of holiday candy from being mindlessly wasted. Be secure in the fact that while the rest of the world is looting grocery stores after the economy collapses, your family will be dining on the freshest 5 year old gummy worms you ever tasted. ;)
Post Post: I forgot to tell you...You can unseal and reseal your jars over and over again! Pretty cool, eh?
***Post Post Post: I ordered another food saver lid for myself after writing this post and there was NO plastic tubing in the box! I had assumed it came with the contraption. When I questioned my mom about this, she told me she had actually purchased the tubing from a medical supply store and that it does NOT come with the food saver lid. I'm sorry to complicate things, but add one more step: Go to your local medical supply store and purchase a short length of medical tubing (Ex: nasal cannula, oxygen tubing, IV tubing, etc.)
Post Post Post POST: Here's a vlog Jeigh and I made to show you how to drypack!
4.16.2011
Gray Hair #437
Joe taught me a little trick right after we were married.
(Get your mind out of the gutter people!)
He showed me that the way to tell if your spaghetti noodles were done cooking was to gently throw one against the wall. (Have you heard of this method?)
If it falls off, the noodles need more time to cook.
If it sticks, the noodles are ready to drain and eat.
Handy, right?
Guess who else he taught this little technique to.


(Get your mind out of the gutter people!)
He showed me that the way to tell if your spaghetti noodles were done cooking was to gently throw one against the wall. (Have you heard of this method?)
If it falls off, the noodles need more time to cook.
If it sticks, the noodles are ready to drain and eat.
Handy, right?
Guess who else he taught this little technique to.


4.13.2011
No More Porn for Me
In a fit of familial improvement, I canceled our Dish satellite service a couple of weeks ago even though we still had a several months left on our contract. It was a little painful the first day or two, but life went on and I haven't felt a morsel of regret yet for cutting off the media mayhem. But I would be fibbing if I told you I still didn't miss watching TV sometimes.
It's Food Network that I miss the most. Even if I have no intention of going near my kitchen much less trying to recreate the recipes I see, I love me some Food Network.
It's porn for dieters. Delicious, entertaining, mouth-watering porn.
I knew I had a problem. I just couldn't get enough of the Food Network. But when it comes to Food Network sometimes its the cooks, chefs, and TV personalities that leave a bad taste in my mouth. Not the food.
Giada.

Too perfect. Too...perky. I ask you, how can she be that skinny? She makes pasta with sauces and cheeses for crying out loud. And for heaven's sake, can the smile lady! My eyes hurt from its blazing rays.
Bobby Flay.

Brilliant. But cranky. He needs to take a hint from Giada. Smile once in awhile, buddy.
Paula Deen.

If I have to hear "ya'all" one more time I'm going to dip myself in the vat of boiling grease she uses so often. Though, the woman does know how to put a stick of butter to use.
Sandra Lee.

I hear AA is nice. She can't seem to do a single show without an accompanying beverage. Who knew alcohol could be served with breakfast?
Pat and Gina Neely.

A husband and wife duo who somehow manage to make "porn for dieters" feel almost like real porn. Get a room, you two.
Anne Burrell.

I like her recipes, but I can hardly pay attention to her cooking as I am so darn distracted by her incessant and obnoxious hand gestures. It's even more riveting when she's wielding a knife or two in those hands.
Guy Fieri and Anne Burrell.

They probably share DNA. And hair products.
Ina Garten of Barefoot Contessa.

Now here's a lady I can relate to. The woman is "fluffy". This makes me think she actually eats the things she makes. What's that saying about never trust a skinny cook? Exactly.
I've done myself a double favor in cutting off myporn Food Network TV.
I used to watch Iron Chef right before going to bed.

Then I would lay in bed unable to sleep from all the anxiety I had collected from the show. Once I did fall asleep I had restless nightmares of being trapped in a kitchen prison with a huge red-digit clock ticking away, counting down to my certain doom:
A death match with Anne Burrell and her knifed hand gestures.
Or being impaled on Guy Fieri's bleached hair spikes. Or burned at the stake by Giada's gruesome grin.
Or rendered unconcious and lifeless from the stench of Mario Batali's crocs.

All hideous ways to go.
I was kind of hoping if I were going to suffer a food-related death, it would be because I had drowned in a pool of chocolate.
It's Food Network that I miss the most. Even if I have no intention of going near my kitchen much less trying to recreate the recipes I see, I love me some Food Network.
It's porn for dieters. Delicious, entertaining, mouth-watering porn.
I knew I had a problem. I just couldn't get enough of the Food Network. But when it comes to Food Network sometimes its the cooks, chefs, and TV personalities that leave a bad taste in my mouth. Not the food.
Giada.

Too perfect. Too...perky. I ask you, how can she be that skinny? She makes pasta with sauces and cheeses for crying out loud. And for heaven's sake, can the smile lady! My eyes hurt from its blazing rays.
Bobby Flay.
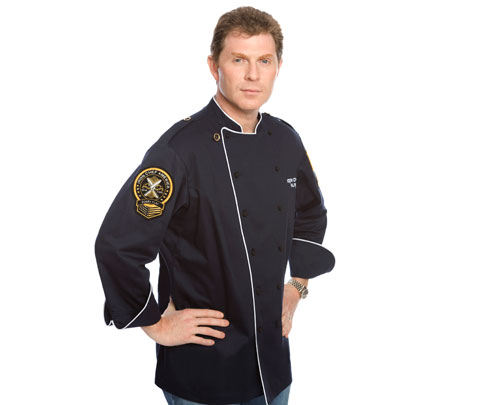
Brilliant. But cranky. He needs to take a hint from Giada. Smile once in awhile, buddy.
Paula Deen.

If I have to hear "ya'all" one more time I'm going to dip myself in the vat of boiling grease she uses so often. Though, the woman does know how to put a stick of butter to use.
Sandra Lee.

I hear AA is nice. She can't seem to do a single show without an accompanying beverage. Who knew alcohol could be served with breakfast?
Pat and Gina Neely.

A husband and wife duo who somehow manage to make "porn for dieters" feel almost like real porn. Get a room, you two.
Anne Burrell.

I like her recipes, but I can hardly pay attention to her cooking as I am so darn distracted by her incessant and obnoxious hand gestures. It's even more riveting when she's wielding a knife or two in those hands.
Guy Fieri and Anne Burrell.

They probably share DNA. And hair products.
Ina Garten of Barefoot Contessa.

Now here's a lady I can relate to. The woman is "fluffy". This makes me think she actually eats the things she makes. What's that saying about never trust a skinny cook? Exactly.
I've done myself a double favor in cutting off my
I used to watch Iron Chef right before going to bed.

Then I would lay in bed unable to sleep from all the anxiety I had collected from the show. Once I did fall asleep I had restless nightmares of being trapped in a kitchen prison with a huge red-digit clock ticking away, counting down to my certain doom:
A death match with Anne Burrell and her knifed hand gestures.
Or being impaled on Guy Fieri's bleached hair spikes. Or burned at the stake by Giada's gruesome grin.
Or rendered unconcious and lifeless from the stench of Mario Batali's crocs.

All hideous ways to go.
I was kind of hoping if I were going to suffer a food-related death, it would be because I had drowned in a pool of chocolate.
12.09.2010
Joe Dun Rill Gud on Hiz Tesst
Joe is back in town today {finally!} after taking and passing his big work test on Tuesday.
He was pretty nervous about passing, but I KNEW he would. He's one smart cookie, even if he says otherwise. Don't let the guy fool ya'. He's too humble for his own good sometimes. (It's one of the things I really love about him.)
I don't know much about what all this test entailed. Only that once passed he would receive a bonus, a raise, and important looking marks on his resume. Good enough for me!
So today we are celebrating his triumph with a holiday breakfast.

My mom has made Breakfast Casserole for Thanksgiving or Christmas for as long as I can remember. I'm not sure why she does it or even where the recipe came from. All I know is it's a tradition that all the son-in-laws in our family L-O-V-E.
Joe missed out on Breakfast Casserole this Thanksgiving since he had to work. After passing his test with flying colors, I thought a little Thursday morning Breakfast Casserole was in order.
Breakfast Casserole
10 slices of white bread (with the crusts trimmed off)
1 cup grated cheddar cheese
9-10 eggs, beaten
1 can cream of mushroom soup
1 lb. link sausages (cut into thirds)
1 and ½ cups milk
¾ tsp dry mustard
½ green pepper, chopped (optional, we have NEVER added this)
4 green onions, chopped (optional, again we have NEVER added this)
Grease a 9 x 13 casserole dish. Cover the bottom with bread slices so that you have one even layer of bread. Sprinkle sausage and grated cheese over bread. (No need to pre-cook the sausage links). Mix eggs, milk, soup, mustard, onions, and peppers. Pour mixture over bread, cheese, and sausage.
Cover lightly and refrigerate overnight. (This recipe can be made the morning of too. It’s just nice to save yourself the time spent slaving away in the kitchen while everyone else is enjoying the holiday fun elsewhere.) In the morning bake at 300 degrees for 1 and ½ hours.
Extra enjoyable and traditional with cherry turnovers on the side.
He was pretty nervous about passing, but I KNEW he would. He's one smart cookie, even if he says otherwise. Don't let the guy fool ya'. He's too humble for his own good sometimes. (It's one of the things I really love about him.)
I don't know much about what all this test entailed. Only that once passed he would receive a bonus, a raise, and important looking marks on his resume. Good enough for me!
So today we are celebrating his triumph with a holiday breakfast.

My mom has made Breakfast Casserole for Thanksgiving or Christmas for as long as I can remember. I'm not sure why she does it or even where the recipe came from. All I know is it's a tradition that all the son-in-laws in our family L-O-V-E.
Joe missed out on Breakfast Casserole this Thanksgiving since he had to work. After passing his test with flying colors, I thought a little Thursday morning Breakfast Casserole was in order.
Breakfast Casserole
10 slices of white bread (with the crusts trimmed off)
1 cup grated cheddar cheese
9-10 eggs, beaten
1 can cream of mushroom soup
1 lb. link sausages (cut into thirds)
1 and ½ cups milk
¾ tsp dry mustard
½ green pepper, chopped (optional, we have NEVER added this)
4 green onions, chopped (optional, again we have NEVER added this)
Grease a 9 x 13 casserole dish. Cover the bottom with bread slices so that you have one even layer of bread. Sprinkle sausage and grated cheese over bread. (No need to pre-cook the sausage links). Mix eggs, milk, soup, mustard, onions, and peppers. Pour mixture over bread, cheese, and sausage.
Cover lightly and refrigerate overnight. (This recipe can be made the morning of too. It’s just nice to save yourself the time spent slaving away in the kitchen while everyone else is enjoying the holiday fun elsewhere.) In the morning bake at 300 degrees for 1 and ½ hours.
Extra enjoyable and traditional with cherry turnovers on the side.
12.02.2010
AFTER the Happily Ever After (A Recipe)

Once upon a time...
There was an incredibly beautiful young girl named
She wanted a fairy tale ending. A fairy tale that came complete with one handsome prince and one comfortable cottage (she was willing to wait for the castle to come) that would be absolutely brimming full of babies.
And guess what? Our fair maiden got exactly what she asked for: a fairy tale ending.
Only problem is she didn't realize "ending" really meant "beginning".
Who knew there was a big fat AFTER to the Happily Ever After?
Some days that "after" part can get a little intense and our fair maiden tries to remember exactly what she had in mind for herself those many years ago. She felt quite certain she had been destined to be a skinny, saucy, stellar housekeeper, wife, and mother.
Hmm...About that...
Like any good story, you can trust that our maiden/heroine will continue to persevere and reach for her fairy tale ENDING.
But some days, she likes to just sit in her cluttered, chaotic cottage and reminisce about those good ol' days of romance and peace and quiet and pumpkin carriages. And on those days she says, "Ahhh, forget it! Let's eat cake!"

All the credit for this idea goes to Mormon Mommy Blogs, but I just had to give it a try. Look how fun it is! And who cares if Thanksgiving is over?
For this recipe/craft/centerpiece you will need:
 -2 cake mixes (pick your favorite flavor!)
-supplies to make cake mixes (eggs, water, oil)
-2 bundt pans
-frosting (you could make your own or buy the pre-made stuff)
-food coloring
-an ice cream cone
-cake plate

Mix up both cake mixes. Let your

Pour one cake mix batter in each bundt pan and bake according to box directions.

Allow cakes to cool completely before decorating. Mix up some orange frosting.

Cut the tops (or are those the bottoms?) off of each bundt cake making sure they are level.

Smear some frosting on one cake to create a "glue".

Stack and match up cakes.

Carefully spread frosting over entire pumpkin cake. (In hindsight I may not have used such a dark cake mix that can "peek through" and I would have tried to make my frosting a much more brilliant orange.)

Place cake on a decorative cake plate. I don't have a cake plate so I just used an upside down decorative leaf plate. Prop an ice cream cone in the center as the stem. I dampened the ice cream cone and sprinkled green crystal sprinkles on it. I added some fake green leaves I had from another project.
...And they ate happily ever after!
11.21.2010
Sweet Sticky Buns of Goodness
Elle has a fever and a nasty little case of croup.
All the kids are hacking up lungs.
Joe is long gone to work until late tonight.
It snowed a couple of inches last night and continues to collect. (YIPPEE!!)
So...We are skipping church and sticking close to the hearth today.
How fortunate that I had the foresight to make up a batch of Sticky Buns last night...
I have posted a recipe called Monkey Bread before. Every time I talk about Monkey Bread people assume it is this recipe, what my family likes to call Sticky Buns. Let there be no confusion; they are two totally different culinary concoctions.
Sticky Buns (NOT to be confused with Monkey Bread)
(This ingredient list makes ONE pan of Sticky Buns, but I have never made just one pan. I always double this recipe making two pans.)
18 frozen Rhoads rolls

One 3.5 oz package butterscotch pudding NON-instant (also called Cook N’ Serve)

½ cup brown sugar, tightly packed
¼ cup margarine or butter
1 tsp cinnamon
Chopped pecans or walnuts
1. Grease a Bundt pan by spraying non-stick cooking spray all over inside of pan.
2. Spread chopped nuts evenly over bottom of pan. (If Joe had his way, this step would be banished.)
3. Place frozen rolls evenly in pan on top of chopped nuts.
4. Sprinkle pudding on frozen rolls.
5. Melt margarine in microwave.
6. Mix cinnamon and brown sugar into melted margarine until thoroughly distributed.
7. Pour margarine, sugar, and cinnamon mixture over frozen rolls in pan.

8. Cover with a clean kitchen towel and let sit to defrost and raise overnight.

9. In the morning, preheat oven to 350 degrees. Bake Sticky Buns for 20 minutes. Make sure buns are neither doughy nor burnt.
10. Remove from oven and cover Bundt pan with a large plate. Turn over carefully, transferring the Sticky Buns onto the plate.

Dive in, but try to be careful not to burn your mouth in your haste to eat these delicious breakfast goodies.
All the kids are hacking up lungs.
Joe is long gone to work until late tonight.
It snowed a couple of inches last night and continues to collect. (YIPPEE!!)
So...We are skipping church and sticking close to the hearth today.
How fortunate that I had the foresight to make up a batch of Sticky Buns last night...
I have posted a recipe called Monkey Bread before. Every time I talk about Monkey Bread people assume it is this recipe, what my family likes to call Sticky Buns. Let there be no confusion; they are two totally different culinary concoctions.
Sticky Buns (NOT to be confused with Monkey Bread)
(This ingredient list makes ONE pan of Sticky Buns, but I have never made just one pan. I always double this recipe making two pans.)
18 frozen Rhoads rolls

One 3.5 oz package butterscotch pudding NON-instant (also called Cook N’ Serve)

½ cup brown sugar, tightly packed
¼ cup margarine or butter
1 tsp cinnamon
Chopped pecans or walnuts
1. Grease a Bundt pan by spraying non-stick cooking spray all over inside of pan.
2. Spread chopped nuts evenly over bottom of pan. (If Joe had his way, this step would be banished.)
3. Place frozen rolls evenly in pan on top of chopped nuts.
4. Sprinkle pudding on frozen rolls.
5. Melt margarine in microwave.
6. Mix cinnamon and brown sugar into melted margarine until thoroughly distributed.
7. Pour margarine, sugar, and cinnamon mixture over frozen rolls in pan.

8. Cover with a clean kitchen towel and let sit to defrost and raise overnight.

9. In the morning, preheat oven to 350 degrees. Bake Sticky Buns for 20 minutes. Make sure buns are neither doughy nor burnt.
10. Remove from oven and cover Bundt pan with a large plate. Turn over carefully, transferring the Sticky Buns onto the plate.

Dive in, but try to be careful not to burn your mouth in your haste to eat these delicious breakfast goodies.
Subscribe to:
Posts (Atom)


LinkWithin
